Farmers rely on structured vaccination plans to protect herds․ A PDF schedule outlines timing for core vaccines, worming, and seasonal boosters․ It includes recommended age windows, dosage, and administration routes, ensuring compliance with regulations and optimal herd health․
Guidelines also set booster intervals and record‑keeping to support herd resilience dailyy!
Purpose of Vaccination Programs
Vaccination schedules serve as a cornerstone for herd health management, aligning preventive care with the biological rhythms of cattle and the epidemiological patterns of disease․ By establishing a systematic timetable for immunizations, producers can ensure that animals receive core protection against the most prevalent and economically devastating pathogens—such as bovine respiratory syncytial virus, parainfluenza, infectious bovine rhinotracheitis, and foot‑and‑mouth disease—at the optimal age and physiological stage․ The schedule also integrates ancillary interventions, including anti‑parasitic treatments and nutritional boosters to reinforce overall immunity․ Compliance with a documented plan facilitates traceability, enabling rapid response to outbreaks, and supports regulatory reporting requirements that safeguard public health and trade․ Moreover, a well‑structured vaccination program reduces the need for therapeutic antibiotics, thereby mitigating antimicrobial resistance risks and aligning with global sustainability goals․ The cumulative effect is a resilient herd that maintains productivity, minimizes veterinary costs, and enhances market competitiveness․ In addition, the schedule aligns with seasonal variations in pathogen prevalence, ensuring that vaccinations are administered before peak infection periods․ Farmers can also coordinate with herd health monitoring systems to adjust timing based on herd immunity data, thereby optimizing vaccine efficacy and reducing waste․ The structured approach supports herd‑level biosecurity, limiting disease spread within and between herds, and contributes to the overall welfare of the animals․ Finally, integrating vaccination records with herd management software streamlines compliance audits and facilitates data‑driven decision making, ultimately enhancing the economic resilience of livestock operations․ All schedules are downloadable PDFs!
Key Diseases Targeted in Cattle
Vaccination schedules focus on the most impactful diseases that threaten cattle health and productivity․ Core targets include bovine respiratory disease complex (BRDC), foot‑and‑mouth disease (FMD), parainfluenza‑1, infectious bovine rhinotracheitis (IBR), bovine viral diarrhea (BVD), clostridial enteritis, and parasitic infections such as gastrointestinal nematodes; Each disease’s epidemiology, transmission routes, and economic burden shape the timing and frequency of immunization․ BRDC, a multifactorial syndrome, is mitigated by vaccines against Mannheimia haemolytica, Pasteurella multocida, and bovine viral diarrhea virus, administered during pre‑weaning and pre‑calving periods․ FMD, a highly contagious vesicular disease, requires annual or bi‑annual boosters depending on regional risk, with strict compliance to international trade regulations․ Parainfluenza‑1 and IBR vaccines are combined in many commercial formulations to reduce respiratory morbidity in calves and heifers․ BVD vaccination protects against both acute and persistent infections, essential for maintaining herd fertility and reducing calf mortality․ Clostridial enteritis, caused by toxins from Clostridium perfringens, Clostridium difficile, and Clostridium sordellii, is controlled through a multivalent vaccine given at birth and during the first year of life․ Parasitic control, though not a viral disease, is integral to vaccination programs; anti‑helminthic treatments are scheduled concurrently with vaccine boosters to prevent immune suppression and weight loss․ By aligning vaccine administration with the life cycle of these pathogens, producers achieve optimal herd immunity, lower veterinary costs, and safeguard animal welfare․
Additional priority diseases include bovine tuberculosis, brucellosis, and mastitis․ Tuberculosis vaccination is limited to areas with endemic risk and requires a single dose in young stock, followed by periodic testing; Brucellosis control relies on a single booster in heifers before breeding, coupled with strict movement controls․ Mastitis, while primarily a bacterial infection, is addressed through herd hygiene and selective vaccination against Staphylococcus aureus and Streptococcus agalactiae, often administered during the dry‑off period․ Seasonal variations in pathogen prevalence also influence vaccine timing; for example, tick‑borne diseases such as anaplasmosis and babesiosis are targeted with vaccines in spring and early summer to pre‑empt peak tick activity․ The integration of these disease targets into a cohesive PDF schedule allows producers to track immunization status, plan logistics, and maintain compliance with national and international health standards․
To maximize coverage, many producers adopt a staggered approach, giving initial doses at birth, followed by boosters at 6, 12, and 18 months, with a final pre‑breeding shot 2–4 weeks before calving․ This ensures cattle enter each critical period armed with robust immunity now!
Regulatory Framework and PDF Availability
Compliance hinges on national regulations and accessible PDFs․ New Mexico State University publishes a free “Cattle Vaccination Schedule” PDF, while the USDA’s Animal Health Service offers downloadable guidelines․ Veterinary boards mandate record‑keeping, and export markets require proof of vaccination per international standards․ Download the PDF from the university site․ now!?․
Regulatory and PDF Availability
Regulatory frameworks governing cattle vaccination schedules safeguard animal health, public safety, and trade integrity․ In the United States, the FDA and USDA jointly oversee vaccine approval, labeling, and distribution, ensuring safety and efficacy․ The FDA’s Center for Veterinary Medicine evaluates vaccine safety, while the USDA’s Animal and Plant Health Inspection Service enforces import and export requirements and monitors outbreaks․ State veterinary boards issue licensing requirements for manufacturers and veterinarians, ensuring products meet local health standards․ Internationally, the World Organisation for Animal Health publishes the International Animal Health Code, setting minimum standards for vaccine registration, documentation, and post‑marketing surveillance․ Countries in the OIE framework provide detailed dossiers, including clinical trial data, lot‑by‑lot consistency reports, and adverse event monitoring․ These dossiers are publicly available through national regulatory agency websites, allowing farmers and veterinarians to verify product authenticity before purchase․ Comprehensive, downloadable PDF schedules have become a cornerstone of modern herd management․ New Mexico State University offers a free, downloadable “Cattle Vaccination Schedule” PDF that outlines core vaccines, worming protocols, and seasonal boosters, updated annually․ The USDA’s Animal Health Service publishes PDF documents detailing recommended vaccination timelines for dairy, beef, and mixed‑herd operations․ Commercial vaccine manufacturers provide PDF reference charts and vaccination guides on their websites, such as Elanco’s “Cattle Vaccine Reference Chart,” offering quick‑reference tables of vaccine names and active ingredients․ Farmers and veterinarians must maintain proper record‑keeping under the Animal Health Protection Act, documenting vaccine administrations, lot numbers, dosages, and routes, with records retained for at least five years, and record retention, and compliance․ Export markets often require proof of vaccination against diseases such as foot‑and‑mouth disease, brucellosis, and bovine tuberculosis, with certificates issued by licensed veterinarians․ The OIE’s “Certificate of Vaccination” template is widely used, and many national agencies provide downloadable PDF forms for electronic or printed submission․ In summary, the regulatory landscape for cattle vaccination is multi‑layered, involving federal, state, and international bodies; the availability of up‑to‑date PDF schedules and reference materials empowers farmers to implement evidence‑based vaccination programs that meet legal requirements and protect herd health․
Seasonal Vaccination Programs
Seasonal programs align shots with breeding cycles․ Spring calving schedules recommend pre‑breeding shots in April‑June, worming with Dectomax injectable, and pre‑calving shots in October‑December․ Fall worming uses Dectomax pour‑on or Valbazen․ These PDFs guide timing, dosage, and routes for optimal herd immunity․ Follow record‑keeping․
Seasonal Calving Program Schedule
Seasonal calving programs are structured around the natural breeding cycle to maximize herd health and productivity․ A typical schedule, available in downloadable PDF format from university extension sites and veterinary associations, outlines key intervention points: pre‑breeding vaccinations, worming protocols, pre‑calving boosters, and fall worming․ The schedule is designed to align with the physiological readiness of cows, ensuring that immunity peaks during critical periods such as conception, gestation, and parturition․
- Pre‑breeding Shots (April–June): Administer core vaccines (e․g․, Bovine Viral Diarrhea, Parainfluenza, Bovine Respiratory Syncytial Virus) 2–4 weeks before breeding․ Use 2 mL IM or SQ, following the manufacturer’s dosage chart․ This timing allows antibody titers to rise before the cows are exposed to breeding bulls․
- Spring Worming: Apply Dectomax injectable or pour‑on formulations to control gastrointestinal nematodes․ The injectable form is given 2–3 weeks after the pre‑breeding shots to avoid interference with vaccine uptake․ Pour‑on products can be used concurrently if the herd’s parasite load warrants it․
- Pre‑calving Shots (October–December): Re‑vaccinate with core and emerging disease antigens (e․g․, Mycoplasma bovis, Bovine Leukemia Virus) 2–4 weeks before expected calving․ This booster ensures that maternal antibodies are transferred to the calf via colostrum, providing early life protection․
- Fall Worming: Conduct a second worming cycle using Dectomax pour‑on or Valbazen pour‑on to reduce parasite burdens that accumulate during the summer․ This step is critical for maintaining milk production and preventing reproductive losses․
Farmers should record counts in the same log used for vaccination data, a comprehensive view of herd health and allowing adjustments to worming frequency each year!
The PDF schedule also provides a parasite surveillance section, recommending quarterly fecal egg counts and targeted anthelmintic treatment based on results․ Farmers should record counts in the same log used for vaccination data, enabling a comprehensive view of herd health and allowing adjustments to worming frequency each year․
Record keeping supports regulatory compliance and outbreak investigationss․

Calf Vaccination Guidelines
Calf vaccination protocols are essential for establishing herd immunity early in life․ The New Mexico State University Extension Guide B‑223 provides a PDF that details a schedule, dosage, and administration routes for calves from birth to weaning․ The guide emphasizes maternal interference, timing of primary and booster doses, and the importance of record‑keeping․
- Birth (0–2 days): Administer the first dose of the Bovine Respiratory Disease (BRD) complex (BRSV, PI‑3, BHV‑1) intramuscularly․ Use 2 mL per animal, following the manufacturer’s instructions․ This early exposure helps the calf’s immune system respond before colostrum antibodies wane․
- 2–3 weeks: Give the first booster of the BRD complex and the Bovine Viral Diarrhea (BVD) vaccine․ The booster should be 2 mL IM, spaced 2 weeks after the initial dose to overcome maternal interference․
- 6–8 weeks: Administer the first dose of the Parainfluenza‑3 (PI‑3) and Bovine Respiratory Syncytial Virus (BRSV) vaccines if not already given․ Follow the same 2 mL IM protocol․ Record the date and lot number in the herd health log․
- 12 weeks (pre‑weaning): Provide the second booster of the BRD complex and a single dose of the BVD vaccine․ This timing aligns with the typical weaning age, ensuring that calves are protected during the stressful weaning period․
- Weaning (≈ 16 weeks): Perform a final booster of the BRD complex and administer a BVD vaccine if the herd has a history of BVD outbreaks․ Use the same 2 mL IM dosage․ Record all vaccinations in the same log used for herd health data․
Additional recommendations include worming at 6 weeks with a spectrum anthelmintic, and a routine health check at 12 weeks to assess growth and vaccine response․ The PDF guide also lists contraindications, such as concurrent antibiotic therapy, and provides a troubleshooting section for vaccine reactions․ Farmers should keep a digital copy of the PDF and update the log each time a dose is administered, ensuring compliance with state regulations and facilitating herd‑wide health monitoring․
Ensuring compliance and facilitating herd‑wide health monitoring daily !
Veterinary Clinics and Commercial Vaccine Providers
Veterinary clinics and commercial vaccine providers play a pivotal role in distributing and administering cattle vaccines․ The GoodeLL Veterinary Clinic in the United States offers a comprehensive spring calving program, featuring pre‑breeding shots, worming protocols, and a detailed vaccine reference chart․ Their schedule includes pre‑breeding shots between April and June, pre‑calving shots from October to December, and worming with Dectomax injectable or pour‑on formulations․ The clinic’s online portal provides downloadable PDF schedules that align with the National Animal Health Monitoring System (NAHMS) guidelines․
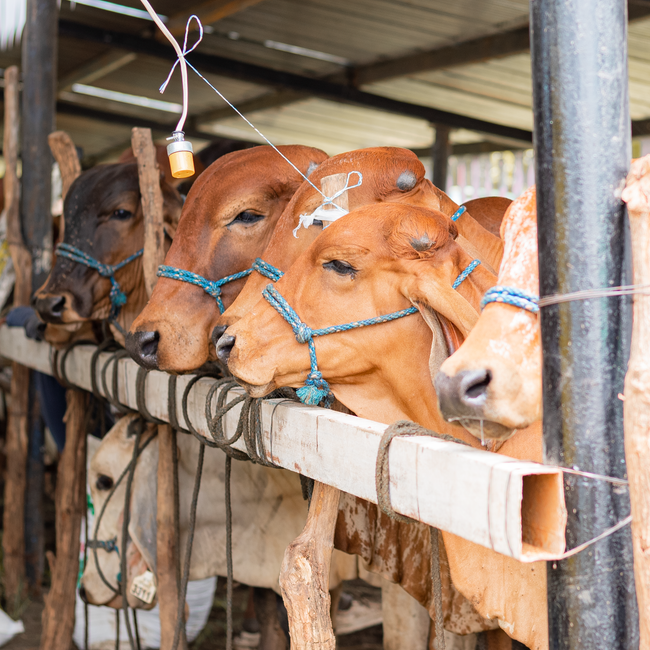
In South Africa, the national Ministry of Agriculture has partnered with commercial distributors to launch mass vaccination campaigns aimed at curbing foot‑and‑mouth disease outbreaks․ The latest initiative, announced in Heidelberg, mobilized thousands of cattle across multiple provinces․ Commercial vaccine suppliers such as Elanco and Zoetis supply the required vaccines, and local veterinary clinics administer the shots under strict biosecurity protocols․ The PDF documents released by the Ministry detail the dosage, route of administration, and timing for each vaccine, ensuring uniformity across the country․
In the United Kingdom, the British Veterinary Association (BVA) collaborates with vaccine manufacturers to produce region‑specific vaccination schedules․ These schedules are available as PDFs on the BVA website and include core vaccine recommendations, worming, and seasonal boosters․ And disease control and biosecurity and monitoring․
Commercial vaccine providers such as Zoetis, Elanco, and Bayer offer platforms where farmers can order vaccines and download PDF schedules․ These platforms provide information, technical support․
Farmers keep a digital copy of the PDF schedule in herd management software, ensuring real‑time updates, compliance, and integration with monitoring systems, safeguarding herd health worldwide daily․
Mass Vaccination Campaigns Worldwide
In recent years, several countries have launched large‑scale cattle vaccination drives to curb disease outbreaks and safeguard food security; South Africa’s Ministry of Agriculture, Fisheries and Forestry announced a nationwide foot‑and‑mouth disease (FMD) mass vaccination program in Heidelberg, deploying thousands of cattle across multiple provinces․ The initiative, coordinated with local veterinary clinics and commercial vaccine suppliers, aimed to immunize herds before the peak of the outbreak, thereby preventing the spread to dairy and beef operations․ The Ministry released a detailed PDF schedule outlining the vaccine type, dosage, and administration timeline, which was distributed to regional veterinary services and livestock owners․
Similarly, the Republic of Kenya’s President William Ruto publicly participated in a livestock vaccination event at Soko Ngombe in Garissa County on February 6, 2025․ The National Livestock Restocking Programme, supported by the Kenya Veterinary Service and private vaccine distributors, targeted both cattle and other ruminants to restore herd numbers after a severe drought․ The PDF schedule, made available through the Ministry’s website, specified the vaccination window, vaccine brands, and required follow‑up boosters, ensuring that farmers could plan their herd management accordingly․
In South Asia, the Sindh provincial government launched a pre‑monsoon livestock vaccination campaign, announced by Minister Muhammad Ali Malkani․ The drive, aimed at protecting animal health before the monsoon season, covered cattle, goats, and sheep across the province․ The campaign’s PDF schedule, published on the Sindh Livestock Department portal, detailed the sequence of vaccines—ranging from rabies and FMD to brucellosis—alongside worming protocols and biosecurity measures․ These mass vaccination efforts demonstrate how coordinated, data‑driven schedules can mitigate disease risks on a national scale, ensuring the resilience of livestock industries worldwide․
and Resources
For detailed cattle vaccination schedules, download the PDF from the NMSU Extension site or the South African Ministry of Agriculture portal․ Contact local veterinarians or Elanco representatives for vaccine selection and booster timing․ Maintain records to comply with regulatory standards․
Download the PDF for a vaccination schedule now
Resources and Contacts
Below is a curated list of authoritative resources and direct contact points for farmers seeking up‑to‑date cattle vaccination schedules, procurement guidance, and regulatory compliance support․ All links lead to official PDFs or live support portals that provide dosage charts, booster timelines, and regional advisories․
- New Mexico State University – Extension Veterinary Services
Calf Vaccination Guidelines (PDF)
Phone: (505) 827‑2128 | Email: vetext@nmsu․edu - South African Department of Agriculture, Forestry and Fisheries
Official FMD Vaccination Campaign PortalPhone: +27 11 123‑4567 | Email: livestock@daf․gov․za
- Elanco Animal Health – Cattle Vaccine Reference Chart
Elanco Vaccination Portfolio
Phone: 1‑800‑ELANCO (1‑800‑324‑2636) | Email: info@elanco․com - USDA National Animal Health Laboratory Center (NAHLC)
NAHLC Vaccine Database
Phone: (202) 775‑1220 | Email: nahlc@usda․gov - World Organisation for Animal Health (OIE)
OIE Vaccination Standards
Phone: +41 22 772‑3000 | Email: info@oie․int
For region‑specific guidance, contact your local veterinary extension office or the national livestock agency․ Keep vaccination records in a (e․g․, spreadsheet or farm management software) to facilitate audit trails and ensure timely booster administration․