
The Honeywell T6 WiFi Thermostat offers a modern, user-friendly solution for smart home temperature control, combining sleek design with advanced features for energy efficiency and remote management․
Overview of the Honeywell T6 Pro WiFi Thermostat
The Honeywell T6 Pro WiFi Thermostat is a cutting-edge, programmable device designed for smart home integration and energy efficiency․ Part of the Lyric series, it offers advanced features like geofencing, voice control, and adaptive recovery․ The thermostat is compatible with various HVAC systems, including forced air, hydronics, and heat pumps, making it versatile for different home setups․ Its sleek, modern design includes a high-resolution touchscreen and remote access via the Honeywell Home app․ The T6 Pro is designed for professional installation, ensuring seamless integration with existing systems․ It also supports multi-stage heating and cooling, providing precise temperature control․ With features like smart scheduling and energy-saving modes, the T6 Pro helps users optimize comfort while reducing energy consumption․ Its compatibility with smart home platforms enhances convenience, making it a robust choice for modern households․
Key Features of the T6 Pro WiFi Thermostat
The T6 Pro WiFi Thermostat by Honeywell features a user-friendly interface with a high-resolution touchscreen, allowing for easy navigation and programming․ It supports WiFi connectivity, enabling remote control and scheduling through the Honeywell Home app․ The thermostat offers geofencing technology, which adjusts temperatures based on your location, enhancing energy efficiency․ It also integrates seamlessly with smart home systems like Amazon Alexa and Google Home․ The T6 Pro includes advanced features such as adaptive recovery, which learns your home’s heating and cooling patterns to maintain optimal temperatures․ It supports multi-stage systems, including heat pumps, and provides energy usage reports to help reduce consumption․ With a focus on compatibility and flexibility, the T6 Pro is designed to work with various HVAC configurations, ensuring efficient and precise temperature control for any home․

Pre-Installation Requirements
Ensure compatibility with your HVAC system, verify electrical requirements, and gather necessary tools like screwdrivers and a voltage tester before starting the installation process․
Compatibility Check for the T6 Pro WiFi Thermostat
Before proceeding with the installation, it is crucial to verify that the Honeywell T6 Pro WiFi Thermostat is compatible with your existing HVAC system․ This thermostat is designed to work with a variety of heating, cooling, and heat pump systems, including conventional forced air, hydronics, and heat pump configurations․ Ensure your system supports the required wiring connections, such as 24VAC power and the appropriate number of stages․ Additionally, check if your HVAC system requires any specific features like two-stage heating or cooling, which the T6 Pro supports․ Compatibility also extends to smart home systems, allowing integration with platforms like Amazon Alexa and Google Home․ For precise compatibility, consult the detailed specifications in the installation manual or contact Honeywell customer support if you are unsure about your system’s requirements․
Tools and Materials Needed for Installation
To successfully install the Honeywell T6 Pro WiFi Thermostat, you will need a few essential tools and materials․ Start with a screwdriver for removing wires and mounting components․ A drill and wall anchors are necessary for securing the UWP (Universal Wall Plate) to the wall․ Ensure you have a level to align the plate properly․ Wire strippers may be required for preparing connections, and a voltage tester is recommended to verify power is off․ Additionally, the installation package includes the UWP, Honeywell Standard Installation Adapter, and a decorative cover plate․ Don’t forget extra AA batteries for the thermostat․ Always turn off power at the breaker before starting․ For specific requirements, refer to the installation manual or contact Honeywell support for guidance․

Installation Process
The Honeywell T6 Pro WiFi Thermostat installation involves mounting the UWP, connecting wires to your HVAC system, and configuring the thermostat using the Honeywell Home app․
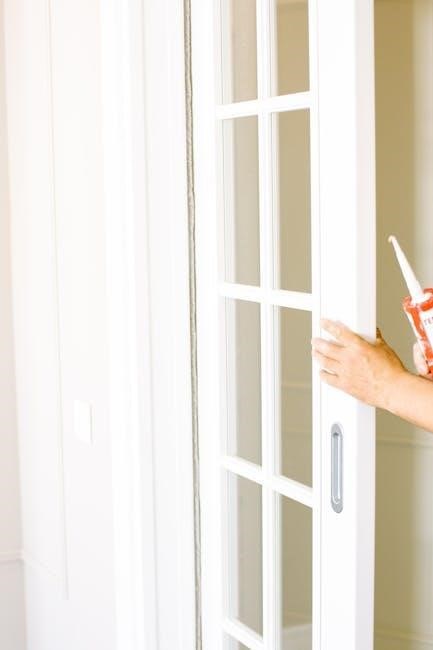
Mounting the UWP (Universal Wall Plate)
To mount the UWP (Universal Wall Plate), begin by turning off the power at the breaker box․ Separate the Junction Box Adapter from the Cover Plate, then mount the adapter to the wall or electrical box using the provided screws․ Ensure the adapter is level and secure․ Next, position the UWP on the wall, mark the hole locations, and drill pilot holes․ Insert the wall anchors and screw the UWP into place․ Align the UWP with the Junction Box Adapter, snapping it securely onto the top hook and bottom tabs․ Close the UWP door to confirm proper installation․ Ensure no wires are pinched and the plate is flush against the wall․ This step ensures a stable base for the thermostat, providing a clean and professional finish․
Connecting the Thermostat to the HVAC System
Connect the Honeywell T6 Pro WiFi Thermostat to your HVAC system by first ensuring the power is off at the breaker․ Attach the wires from your HVAC system to the corresponding terminals on the Universal Wall Plate (UWP), such as R (power), W (heating), Y (cooling), and G (fan); For heat pumps, additional wires may be required․ Adjust the slider tabs on the UWP to match your system configuration, such as 1H/1C or 2H/2C․ After connecting the wires, turn the power back on and test the thermostat to ensure proper functionality․ Proper wiring ensures safe and efficient operation of your HVAC system with the T6 Pro thermostat․
Wiring Conventional Systems (Forced Air and Hydronics)
For conventional systems like forced air or hydronics, connect the R (24V power) wire to the R terminal on the UWP․ The W wire goes to the heating terminal, and the Y wire connects to the cooling terminal․ If your system has a fan, attach the G wire to the fan terminal․ Ensure all connections are secure and match the system’s requirements․ For dual-transformer systems, verify that both heating and cooling transformers are connected correctly․ After wiring, turn the power on and test each mode (heat, cool, fan) to confirm proper operation․ Always refer to your HVAC system’s specifications to ensure compatibility with the Honeywell T6 Pro WiFi Thermostat․
Wiring Heat Pump Systems
When wiring a heat pump system for the Honeywell T6 Pro WiFi Thermostat, connect the R (24V power) wire to the R terminal on the UWP․ The W wire goes to the heating terminal, and the Y wire connects to the cooling terminal․ For 1H/1C systems, attach the O/B wire to the O/B terminal․ For 3H/2C systems, additional wires may be required for staging․ Ensure all connections are secure and match your system’s specifications․ After wiring, turn the power on and test each mode (heat, cool, emergency heat) to confirm proper operation․ Refer to your HVAC system’s documentation for specific requirements, as configurations may vary․ Always double-check connections to avoid errors and ensure safe operation․
WiFi Setup and Configuration
Connect the T6 Pro to your home WiFi network using the Honeywell Home app․ Ensure your router is nearby for a stable internet connection and smart functionality․
Connecting the T6 Pro to Your Home WiFi Network
To connect the Honeywell T6 Pro WiFi Thermostat to your home network, start by ensuring your router is operational and within range․ Open the Honeywell Home app, select “Add Device,” and choose the T6 Pro from the list․ The thermostat will display a temporary WiFi network to join․ Follow in-app instructions to transfer your home WiFi credentials to the thermostat․ Once connected, a confirmation message will appear․ Ensure the thermostat is updated to the latest firmware for optimal performance and security․ If issues arise, reset the thermostat or check your router settings for stability․
Setting Up the Thermostat Using the Honeywell Home App
After connecting the T6 Pro to your WiFi network, open the Honeywell Home app to complete the setup․ The app will automatically detect the thermostat and guide you through the initial configuration․ You’ll be prompted to set your location, preferred temperature units, and system type (e․g․, forced air, heat pump)․ Next, create a schedule by setting temperature preferences for different times of the day․ Customize settings like geofencing, which adjusts the temperature based on your location, or enable smart recovery to reach your desired temperature by a specific time․ Finally, review and save your settings to ensure your thermostat operates efficiently and according to your preferences․
Advanced Configuration Options
Customize your T6 Pro with advanced features like scheduling, geofencing, and smart home integration for enhanced automation and energy-saving capabilities․
Scheduling and Energy-Saving Features
The Honeywell T6 Pro WiFi Thermostat offers robust scheduling and energy-saving features, enabling users to create custom temperature schedules that align with their daily routines․ Through the Honeywell Home app, homeowners can set up to six different temperature settings per day, optimizing comfort and energy usage․ The thermostat also incorporates smart energy-saving modes, such as automatic adjustments when the home is unoccupied or when the system is not in use․ Additionally, the T6 Pro supports geofencing, which uses the homeowner’s location to adjust temperatures, further enhancing energy efficiency․ These features not only reduce energy consumption but also provide a seamless and intuitive user experience․ By leveraging these advanced configurations, users can maximize both comfort and energy savings․
Geofencing and Smart Home Integration
The Honeywell T6 Pro WiFi Thermostat integrates seamlessly with smart home systems, offering advanced features like geofencing and voice control․ Geofencing uses your smartphone’s location to automatically adjust temperatures when you leave or arrive home, optimizing energy usage․ Compatibility with Amazon Alexa and Google Home allows for voice commands, enhancing convenience; The thermostat also works with other smart devices, creating a unified home automation experience․ Through the Honeywell Home app, users can set up custom geofencing zones and integrate their thermostat with smart home hubs․ These features not only improve energy efficiency but also provide unparalleled control and flexibility, making it easier to manage your home’s comfort from anywhere․ This integration ensures the T6 Pro adapts to your lifestyle, delivering smart, efficient, and user-friendly temperature management․

Troubleshooting Common Issues
Troubleshooting common issues with the Honeywell T6 WiFi Thermostat involves addressing WiFi connectivity problems, display malfunctions, and system errors․ Restarting the device and checking connections often resolve these issues․ Refer to the manual for detailed solutions․
Resolving WiFi Connectivity Problems
Resolving WiFi connectivity issues with the Honeywell T6 Pro WiFi Thermostat involves several troubleshooting steps․ First, ensure the thermostat is connected to the correct home network and that the WiFi signal is strong․ Restart the thermostat by removing it from the wall plate and reinstalling it․ If issues persist, restart your router and modem․ Check for firmware updates in the Honeywell Home app, as outdated software can cause connectivity problems․ Verify that the thermostat is within range of your router and that no physical obstructions are blocking the signal․ If the thermostat still fails to connect, perform a factory reset by holding the center and buttons for 10 seconds․ For persistent issues, contact Honeywell customer support for further assistance․
Addressing Heating and Cooling System Errors
Addressing errors in the heating and cooling system with the Honeywell T6 Pro WiFi Thermostat starts with checking system status in the Honeywell Home app․ Ensure the thermostat is properly configured for your HVAC setup․ If the system fails to activate, verify wiring connections, especially the R/Rc and W/W1 terminals․ Check for blown fuses or tripped circuit breakers․ Ensure the system switch is set to the correct position (heat, cool, or auto)․ If the thermostat displays an error code, refer to the user manual or online resources for specific troubleshooting steps․ For persistent issues, perform a system test via the installer setup menu to identify faults․ Contact a licensed HVAC technician if problems persist after basic troubleshooting․ Regular maintenance, such as cleaning air filters, can also prevent system errors and ensure optimal performance․

Customer Support and Resources
Honeywell offers comprehensive support through their website and customer service hotline․ Visit customer․honeywell․com or call 1-800-633-3991 for assistance․ Online manuals and guides are also available for troubleshooting and setup․
Contacting Honeywell Customer Support
For assistance with the Honeywell T6 WiFi Thermostat, contact Honeywell’s customer support team․ Visit their official website at customer․honeywell․com for troubleshooting guides, manuals, and FAQs․ You can also reach their customer care team by calling the toll-free number 1-800-633-3991․ Representatives are available to help with installation, configuration, and resolving any issues related to your thermostat․ Additionally, Honeywell provides detailed installation manuals and user guides on their website, ensuring you have all the resources needed for a smooth setup and operation of your T6 WiFi Thermostat․