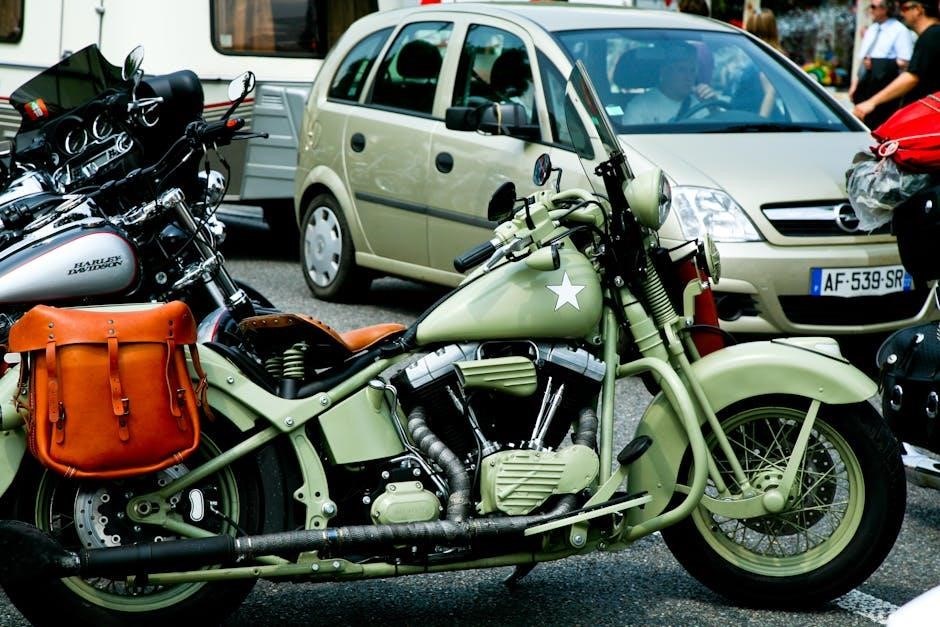
Regular maintenance is crucial for optimal performance‚ safety‚ and longevity of your Harley-Davidson. This guide provides a structured approach to understanding and following recommended service intervals‚ ensuring your bike runs smoothly and retains its value. Referencing the Harley-Davidson maintenance schedule PDF ensures you stay on track with essential inspections and replacements‚ tailored to your motorcycle’s specific needs and model year.
1.1 Importance of Regular Maintenance
Regular maintenance is essential for ensuring your Harley-Davidson performs optimally‚ remains safe‚ and retains its value. It prevents potential issues before they escalate‚ reducing the risk of costly repairs. By following the recommended schedule‚ you maintain warranty compliance and ensure all systems function as intended. Proper upkeep also enhances riding safety and overall reliability‚ keeping your bike in peak condition for years to come.
Consistent servicing guarantees your motorcycle operates efficiently‚ preserving its power and responsiveness; Regular checks also help identify wear and tear early‚ preventing major breakdowns. This proactive approach ensures your Harley-Davidson remains a reliable and enjoyable ride‚ adhering to both manufacturer standards and local regulations.
1.2 Overview of the Harley-Davidson Maintenance Schedule PDF
The Harley-Davidson maintenance schedule PDF is a comprehensive guide detailing service intervals‚ inspections‚ and replacements for various motorcycle models. It includes tables outlining specific tasks at 1‚000‚ 5‚000‚ 10‚000‚ and 20‚000 miles‚ ensuring clarity and organization. The document covers oil changes‚ chain adjustments‚ brake inspections‚ and air cleaner maintenance‚ providing a clear roadmap for owners to follow.
Model-specific schedules‚ such as those for Softail‚ Touring‚ and Sportster models‚ are also included‚ ensuring tailored maintenance plans. The PDF serves as an essential resource for keeping your Harley-Davidson in optimal condition and complying with warranty requirements. Regularly consulting this guide helps prevent issues and ensures your bike performs at its best.

Recommended Service Intervals
Regular services at 1‚000‚ 5‚000‚ 10‚000‚ and 20‚000 miles ensure optimal performance‚ covering oil changes‚ chain adjustments‚ and brake inspections.
2.1 1‚000 Miles Service
The 1‚000-mile service is the first checkpoint in Harley-Davidson’s maintenance schedule. It includes an oil and filter change‚ primary chain inspection and adjustment‚ and brake pad inspection. Additionally‚ the air cleaner is checked‚ and clutch adjustment is performed if necessary. This initial service ensures the motorcycle is running smoothly and addresses any potential issues early. Regular adherence to this schedule helps maintain performance‚ reliability‚ and warranty compliance‚ keeping your Harley-Davidson in pristine condition for years to come.
2.2 5‚000 Miles Service
The 5‚000-mile service builds on the initial checks‚ with an oil and filter change being a primary focus. The air cleaner is inspected and serviced as needed‚ while the primary chain is adjusted to maintain proper tension. Brake pads and rotors are also examined for wear. Additionally‚ the battery is tested‚ and all fluids are topped off. This service ensures continued optimal performance and prevents potential issues from developing into major repairs‚ aligning with Harley-Davidson’s recommendations for consistent maintenance.
2.3 10‚000 Miles Service
The 10‚000-mile service is a more comprehensive check‚ focusing on critical components to ensure longevity. It includes an oil and filter change‚ inspection of the air cleaner‚ and adjustment or replacement of the primary chain. Brake pads and rotors are thoroughly examined‚ and the brake fluid is replaced. Additionally‚ the drive belt is inspected for wear‚ and spark plugs are replaced. Fork oil is changed‚ and all fasteners are checked for tightness. This service ensures the bike remains in peak condition and addresses any emerging issues promptly.
2.4 20‚000 Miles Service
The 20‚000-mile service is a major maintenance checkpoint‚ ensuring your Harley-Davidson remains reliable and efficient. This service includes all tasks from the 10‚000-mile check‚ plus additional detailed inspections. The transmission and primary chaincase fluids are replaced‚ and the clutch is inspected for wear. Fork seals and wheel bearings are checked‚ and the shocks are serviced. The battery is tested‚ and the cooling system is flushed and refilled. This comprehensive service ensures optimal performance and prevents potential breakdowns‚ keeping your motorcycle in excellent condition for years to come.
Detailed Maintenance Tasks
Regular maintenance ensures your Harley-Davidson runs smoothly. Key tasks include oil changes‚ tire inspections‚ and chain adjustments. Following the schedule enhances performance and longevity.
3.1 Oil Change and Filter Replacement
Oil changes are essential for engine health. Replace the oil and filter every 5‚000 miles to maintain lubrication and prevent wear. Use synthetic oil for optimal performance. Check the owner’s manual for specifics. Dispose of used materials responsibly. Always use genuine Harley-Davidson parts for reliability. Refer to the maintenance schedule PDF for detailed instructions. Regular oil changes ensure your bike runs smoothly and prolong its lifespan. Stay consistent with this critical maintenance task for peak performance and durability.
3.2 Primary Chain Inspection and Adjustment
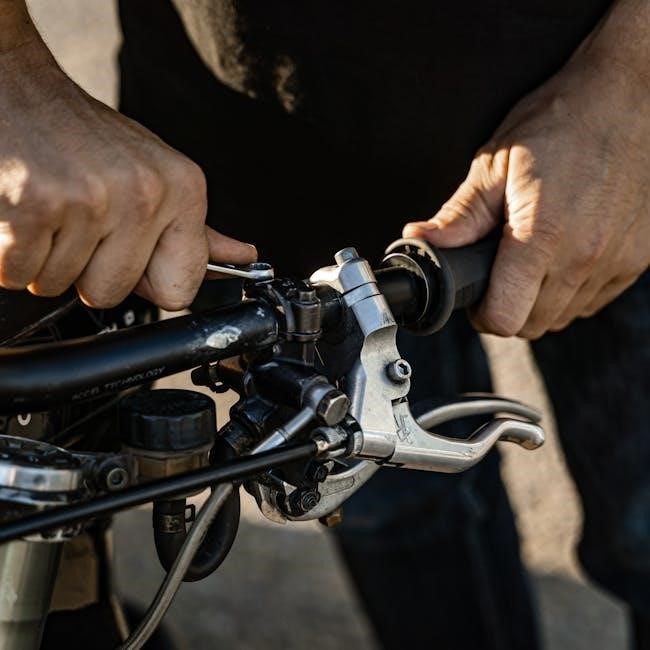
Inspect the primary chain every 1‚000 miles and adjust as needed to ensure proper tension. A loose chain can cause damage‚ while excessive tightness may lead to wear. Refer to the maintenance schedule PDF for specific guidelines. Lubricate the chain with Harley-Davidson-approved products to maintain its condition. Adjustments should align with manufacturer specifications to avoid mechanical issues. Regular inspections and timely adjustments ensure smooth power transmission and prevent costly repairs. Keep your bike running efficiently by adhering to this crucial maintenance step.
3.3 Brake Pad Inspection
Inspect brake pads every 1‚000 miles and replace them when worn below the minimum thickness specified in your Harley-Davidson maintenance schedule PDF. Look for signs of wear‚ such as uneven thinning or damage. Properly functioning brakes are critical for safety‚ so ensure pads are free from contamination and debris. If pads are worn‚ replace them promptly to maintain optimal braking performance and prevent damage to other components like rotors. Regular inspections help avoid costly repairs and ensure reliable stopping power.
3.4 Air Cleaner Inspection
Inspect the air cleaner every 5‚000 miles as detailed in the Harley-Davidson maintenance schedule PDF. Clean or replace the element if dirty or damaged to ensure proper airflow and engine performance. A dirty air cleaner can reduce fuel efficiency and power. Use Harley-Davidson-approved cleaning solutions or replace the filter as needed. Regular inspection prevents debris buildup and maintains optimal engine function‚ ensuring your bike runs smoothly and efficiently under all conditions.
Downloadable PDF Resources
Access official Harley-Davidson maintenance guides‚ including the 2022 maintenance tables PDF‚ 2017 schedules‚ and service manuals for specific models‚ to ensure accurate and compliant servicing of your motorcycle.
4.1 2022 Maintenance Tables PDF
The 2022 Harley-Davidson maintenance tables PDF provides detailed service intervals and procedures for various models. It includes tables listing regular inspections‚ lubrications‚ and replacements‚ ensuring your motorcycle operates at peak performance. This resource helps owners and mechanics schedule services accurately‚ covering models like Touring‚ Softail‚ and Sportster. By following the outlined schedule‚ you can maintain your bike’s health and longevity‚ adhering to manufacturer recommendations for optimal functionality and compliance.
4.2 2017 Harley-Davidson Maintenance Schedules PDF
The 2017 Harley-Davidson maintenance schedules PDF is a comprehensive guide outlining service intervals for models from that year. It details inspections‚ lubrications‚ and part replacements‚ ensuring your bike performs optimally. Suitable for Softail‚ Touring‚ and Sportster models‚ this document helps owners and mechanics stay on track with recommended services. By following the schedule‚ you can maintain your motorcycle’s health and longevity‚ adhering to manufacturer guidelines for peak performance and reliability. It’s a valuable resource for anyone looking to keep their 2017 Harley-Davidson in prime condition.
4.3 Service Manual for Touring Models
The service manual for Harley-Davidson Touring Models provides detailed maintenance procedures‚ inspections‚ and part replacements. It covers models like the Electra Glide and Road King‚ ensuring peak performance and reliability. This manual includes step-by-step guides for oil changes‚ brake inspections‚ and belt replacements‚ along with troubleshooting tips. Designed for both novice and experienced riders‚ it helps maintain your Touring bike’s optimal condition‚ ensuring longevity and adherence to manufacturer standards for a smooth riding experience.
Warranty and Compliance
Warranty and Compliance ensures your Harley-Davidson operates within manufacturer standards and local laws. Regular maintenance is crucial for warranty validity. Check with authorized dealers for specific requirements.
5.1 Warranty Requirements
Adhering to the recommended maintenance schedule is essential to maintain your Harley-Davidson’s warranty coverage. Regular services‚ such as oil changes and inspections‚ must be performed by authorized dealers or certified technicians. Keeping detailed service records ensures compliance with warranty terms. Failure to follow the specified intervals may result in coverage denial. Always refer to your owner’s manual or consult with an authorized dealer for specific requirements and updates on warranty conditions.
5.2 Local and Country-Specific Regulations
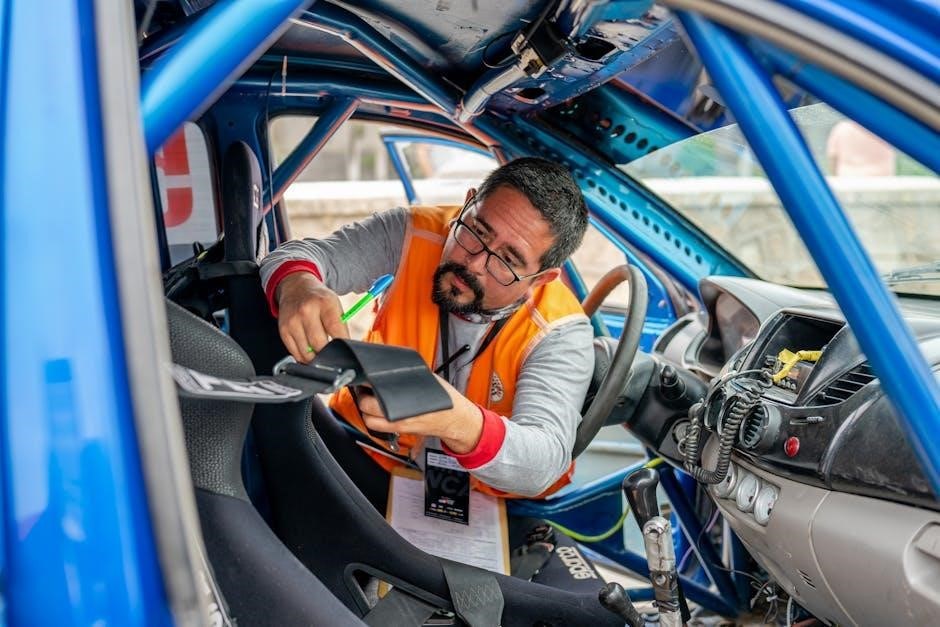
Harley-Davidson maintenance must comply with local and national regulations‚ which vary by country. Emission standards‚ noise levels‚ and safety inspections are key areas to consider. Always check with regional authorities to ensure your motorcycle meets legal requirements. Additionally‚ some countries may have specific service interval recommendations. Consulting an authorized Harley-Davidson dealer can help navigate these regulations‚ ensuring your bike remains compliant and roadworthy. Staying informed about local laws helps avoid potential penalties and maintains your riding privileges.
Authorized Dealer Services
Authorized Harley-Davidson dealers are equipped to provide expert maintenance‚ adhering to the recommended schedules. Their services ensure compliance with warranty requirements and use genuine parts for reliability and performance.
6.1 Role of Authorized Harley-Davidson Dealers
Authorized Harley-Davidson dealers play a vital role in ensuring your motorcycle receives expert care. They use genuine parts‚ adhere to factory specifications‚ and provide warranty-compliant services. Their technicians are trained to handle complex diagnostics and repairs‚ ensuring your bike performs optimally. Regular visits to an authorized dealer help maintain your motorcycle’s health‚ prevent issues‚ and keep it running smoothly for years. This support is essential for both new and seasoned riders.
6.2 Importance of Genuine Replacement Parts
Using genuine Harley-Davidson replacement parts ensures optimal performance‚ safety‚ and reliability. These parts are specifically designed for your motorcycle‚ guaranteeing precise fitment and functionality. They maintain your bike’s integrity‚ uphold warranty conditions‚ and reduce the risk of mechanical issues. Genuine parts are rigorously tested to meet Harley-Davidson’s high standards‚ ensuring durability and consistent quality. Always choose authentic components to preserve your motorcycle’s value and ensure long-term reliability.
Model-Specific Maintenance
Model-specific maintenance ensures your Harley-Davidson performs optimally. Softail‚ Touring‚ and Sportster models have unique needs‚ so always consult the specific manual or guide for tailored recommendations.
7.1 Softail Models
Softail models require specific attention to their unique features‚ such as frame and suspension systems. Regular checks of the hidden rear suspension and tire pressure are essential. Ensure the belt or chain is properly tensioned and lubricated. Refer to the Harley-Davidson maintenance schedule PDF for detailed guidelines tailored to Softail models‚ including oil changes‚ brake inspections‚ and electrical system checks. Adhering to these recommendations ensures optimal performance and longevity for your Softail.
7.2 Touring Models
Touring models‚ known for their long-distance capabilities‚ require specialized maintenance to ensure reliability and comfort. The V-twin engine‚ suspension‚ and electrical systems need regular checks. Pay attention to coolant levels‚ drive belt tension‚ and braking components. Refer to the Harley-Davidson maintenance schedule PDF for specific intervals‚ including oil changes and tire inspections. Proper care extends the life of your Touring bike‚ ensuring it remains ready for the open road. Always consult the service manual for model-specific guidelines.
7.3 Sportster Models
Sportster models‚ known for their lightweight and agility‚ require specific maintenance to maintain their performance and durability. Regular checks include oil changes‚ air filter cleaning‚ and chain or belt drive inspections. The Harley-Davidson maintenance schedule PDF outlines intervals for these tasks‚ ensuring optimal engine health and reliability. Pay attention to tire pressure and brake pad wear‚ as Sportsters are designed for both city and highway riding. Adhering to these guidelines ensures your Sportster remains in peak condition for years of trouble-free riding.

Safety and Pre-Ride Checks
Ensure a safe riding experience with thorough pre-ride inspections. Check tire pressure‚ brakes‚ lights‚ and fluid levels. Refer to the Harley-Davidson maintenance schedule PDF for detailed checklists.
- Inspect tires for wear and proper inflation.
- Test brakes and ensure proper function.
- Verify all lights and signals are operational.
- Check oil‚ coolant‚ and other fluid levels.
8.1 Pre-Ride Inspection Checklist
A thorough pre-ride inspection ensures safety and performance. Start with tire pressure‚ brake function‚ and light operation. Check oil‚ coolant‚ and hydraulic fluid levels. Inspect the chain or belt for wear‚ and ensure all fasteners are secure. Verify proper operation of controls‚ suspension‚ and exhaust systems. Review the Harley-Davidson maintenance schedule PDF for model-specific checks. Address any issues before riding to prevent mechanical failures and ensure a safe‚ enjoyable journey.
8.2 Safety Guidelines for Maintenance
Always wear protective gear‚ including gloves and safety glasses‚ when performing maintenance. Ensure the motorcycle is on a stable stand and the engine is cool. Follow proper procedures for handling fluids and electrical components to avoid accidents. Never skip safety checks outlined in the Harley-Davidson maintenance schedule PDF. Use genuine parts and tools to maintain safety standards. Consult the service manual for specific precautions and ensure all repairs are done correctly to prevent mechanical failure during operation.
Tools and Materials
Essential tools include screwdrivers‚ wrenches‚ and torque tools; Use genuine Harley-Davidson parts and recommended lubricants for optimal performance and longevity. Always refer to the service manual for specific requirements.
9.1 Essential Tools for Harley-Davidson Maintenance
Proper tools are vital for effective maintenance. A socket set‚ torque wrench‚ and screwdrivers are must-haves. Pliers‚ punches‚ and a multimeter can aid in diagnostics. Ensure all tools meet Harley-Davidson specifications to avoid damage. Using the right tools guarantees accurate adjustments and prevents component damage. Always consult the service manual for specific tool recommendations tailored to your model. Having the correct tools on hand saves time and ensures professional-quality results during maintenance tasks.
9.2 Recommended Lubricants and Fluids
Using the correct lubricants and fluids is essential for maintaining your Harley-Davidson’s performance and durability. Harley-Davidson recommends synthetic oil for optimal engine protection. Regularly check and top off fluids like coolant‚ brake fluid‚ and primary chain lube. Always use Harley-Davidson-approved products to ensure compatibility and avoid damage. Refer to your service manual for specific recommendations tailored to your motorcycle’s model and year. Proper fluid maintenance ensures smooth operation‚ prevents corrosion‚ and extends the life of critical components.

Seasonal Maintenance Tips
Seasonal maintenance ensures your Harley-Davidson performs optimally year-round. Prepare for winter with storage tips and gear up for spring with thorough inspections and fluid checks.
10.1 Winter Storage Preparation
Proper winter storage is essential to maintain your Harley-Davidson’s condition. Drain fuel‚ change oil‚ and disconnect the battery. Store in a dry‚ climate-controlled environment to prevent rust and moisture damage. Cover the bike with a breathable material to protect against dust. Avoid using heaters that could dry out rubber components. Regularly check the bike during storage to ensure everything remains in good condition. Follow the maintenance schedule PDF for specific winterization steps to safeguard your motorcycle until spring.
10.2 Spring Maintenance
Spring maintenance is crucial after winter storage to ensure your Harley-Davidson is road-ready. Inspect the battery‚ tires‚ and brakes for any winter-related damage. Check fluid levels‚ including oil and coolant‚ and top them off as needed. Look for signs of rust or corrosion on metal components. Perform a thorough cleaning and lubrication of moving parts. Take a test ride to ensure everything functions smoothly. Refer to the maintenance schedule PDF for model-specific spring maintenance tasks to get your bike in prime condition for riding season.

Troubleshooting Common Issues
Spring maintenance is essential after winter storage. Inspect the battery‚ tires‚ and brakes for damage. Check fluid levels‚ look for rust‚ and clean or replace components as needed. Lubricate moving parts and ensure all systems function properly. A thorough inspection and test ride will prepare your Harley-Davidson for the riding season. Refer to the maintenance schedule PDF for specific spring maintenance tasks to ensure your bike is road-ready.
11.1 Identifying and Addressing Common Maintenance Issues
Common maintenance issues like engine oil leaks‚ worn brake pads‚ or loose primary chains can arise if schedules are neglected. Regular inspections help identify these problems early. Refer to the Harley-Davidson maintenance schedule PDF for guidance on diagnosing and addressing issues. Addressing these promptly prevents minor problems from becoming major repairs. Always use genuine parts and consult authorized dealers for complex fixes to ensure reliability and safety. Proper troubleshooting ensures your bike performs optimally and maintains its longevity.
Record Keeping
Maintaining detailed service records is essential for tracking your Harley-Davidson’s maintenance history. Use the schedule PDF to log dates‚ mileage‚ and services performed‚ ensuring compliance with warranty requirements and enhancing resale value. Accurate records help monitor maintenance intervals and verify completed services‚ providing a clear overview of your bike’s upkeep. Refer to the PDF for guidance on documenting each service‚ ensuring all details are precise and organized for future reference.
12.1 Importance of Service Records
Maintaining accurate service records is vital for ensuring your Harley-Davidson operates safely and efficiently. These records verify compliance with warranty requirements and provide a detailed history of maintenance‚ which can enhance resale value. By logging each service interval and repair‚ you create a clear‚ organized record of your bike’s upkeep. Referencing the maintenance schedule PDF helps ensure all necessary services are documented‚ providing peace of mind and a comprehensive overview of your motorcycle’s care.
12.2 How to Maintain Accurate Service Logs
Accurate service logs are essential for tracking your Harley-Davidson’s maintenance history. Use the maintenance schedule PDF as a guide to record each service interval‚ including dates‚ mileages‚ and details of work performed. Keep both digital and physical copies for easy access. Note the replacement of parts‚ fluids‚ and inspections‚ and include technician signatures if serviced by a professional. This documentation ensures compliance with warranty requirements and provides a clear record of your bike’s upkeep‚ enhancing its resale value.
Environmental Considerations
Proper disposal of used materials like oil‚ filters‚ and chemicals is vital. Follow recycling practices and comply with local environmental regulations to minimize your motorcycle’s ecological impact.
13.1 Proper Disposal of Used Materials
Proper disposal of used materials like oil‚ filters‚ and chemicals is essential to protect the environment. Always follow local regulations and guidelines for hazardous waste disposal. Use authorized recycling centers or service providers to ensure eco-friendly practices. Improper disposal can harm ecosystems and public health. Refer to your Harley-Davidson maintenance schedule PDF for specific recommendations on handling and disposing of motorcycle-related waste responsibly.
13.2 Recycling Practices
Recycling is a key part of responsible Harley-Davidson maintenance. Many materials like metals‚ plastics‚ and fluids can be recycled. Use authorized recycling centers to ensure proper handling ofused parts and fluids. This practice reduces environmental impact and supports sustainability. Always check local guidelines for specific recycling programs. Proper recycling aligns with Harley-Davidson’s commitment to environmental stewardship and helps conserve natural resources for future generations.
Regular maintenance ensures your Harley-Davidson performs safely and efficiently‚ preserving its value and longevity. Adhering to the schedule and proper practices guarantees reliability and environmental responsibility.
14.1 Summary of Key Maintenance Points
Regular oil changes‚ primary chain inspections‚ and brake pad replacements are critical for optimal performance. Adhering to the schedule ensures safety‚ reliability‚ and longevity. Always use genuine Harley-Davidson parts for durability and compliance. Seasonal checks‚ such as winter storage and spring preparation‚ are vital for preserving your bike. Keeping accurate service records maintains warranty validity and resale value. Follow the recommended intervals and guidelines to enjoy consistent performance and minimize mechanical issues over time.
14.2 Final Tips for Harley-Davidson Owners
Always prioritize regular maintenance to ensure your Harley-Davidson performs optimally. Schedule services at recommended intervals and use genuine parts for reliability. Conduct pre-ride inspections and address issues promptly. Proper storage during off-seasons preserves your bike’s condition. Keep detailed service records for warranty compliance and resale value. Stay informed with the latest updates from Harley-Davidson and consult the maintenance schedule PDF for model-specific guidance. Proactive care ensures a safe‚ enjoyable riding experience for years to come.