This structured meal plan combines high protein intake with controlled calorie consumption, focusing on balanced nutrition to support weight loss and energy stability, while avoiding extreme deprivation.
Overview of the Meal Plan
This 7-day meal plan provides approximately 1,600 calories daily, with a focus on high protein intake to support weight loss and energy stability. Designed for individuals weighing around 65 kg, it balances protein, fiber, and healthy fats to keep you satisfied. The plan includes breakfast, snacks, lunch, dinner, and dessert, with portion sizes adjustable based on individual needs. Emphasizing whole foods and nutrient-dense options, it avoids extreme calorie restriction, ensuring a sustainable approach to weight loss while maintaining muscle mass and overall health.
Importance of High Protein in Weight Loss
High protein is essential for weight loss as it helps maintain muscle mass, boosts metabolism, and keeps you fuller longer, reducing cravings and overeating. Protein requires more energy to digest, increasing calorie burn. It also stabilizes blood sugar, preventing spikes and crashes that can lead to unhealthy snacking. By preserving lean muscle, protein supports a stronger, more efficient metabolism, making weight loss more sustainable. Incorporating adequate protein ensures you lose fat, not muscle, achieving a healthier, more toned physique. This balance is key to successful and lasting weight management on a 1600-calorie diet.
Benefits of a 1600 Calorie Diet
A 1600-calorie diet promotes sustainable weight loss while maintaining energy levels. It balances protein and fiber, stabilizing blood sugar and reducing cravings. This plan supports muscle preservation, essential for metabolism, and ensures nutrient-dense meals without extreme deprivation, making it a practical choice for long-term health goals.
Understanding the Basics of the Meal Plan
This plan balances protein, fiber, and healthy fats to promote weight loss and energy stability, emphasizing portion control and nutrient-dense meals for sustainable results.
Calculating Daily Protein Needs
Calculating daily protein needs is crucial for a high-protein, 1600-calorie meal plan. Generally, 0.8-1.2 grams of protein per pound of body weight is recommended, depending on activity levels and weight loss goals. For example, a 65 kg individual might aim for 100-120 grams of protein daily. This ensures muscle preservation and satiety. Adjust portions based on individual caloric needs and physical activity. Balancing protein with fiber and healthy fats supports overall nutrition and weight management. Tailoring intake helps maximize results while maintaining dietary balance.
Role of Fiber in a High Protein Diet
Fiber plays a crucial role in a high protein diet by promoting satiety, improving digestion, and balancing blood sugar levels. It complements protein by preventing blood sugar spikes and supporting gut health. A diet rich in fiber helps maintain energy levels, reducing cravings and overeating. Additionally, fiber aids in the absorption of nutrients from protein sources, ensuring optimal utilization. Incorporating fiber-rich foods like whole grains, vegetables, and legumes alongside protein ensures a balanced and sustainable meal plan, enhancing overall weight loss and health benefits without compromising nutritional needs or satisfaction.
Importance of Hydration
Staying hydrated is crucial for overall health and weight loss success. Water aids digestion, transports nutrients, and supports metabolism. Aim for at least 8 cups (64 oz) daily, adjusting for activity levels. Even mild dehydration can slow metabolism and reduce energy, hindering progress. Incorporate water-rich foods like fruits and vegetables to supplement fluid intake. Proper hydration also helps maintain muscle function and satiety, making it easier to stick to the 1600-calorie high protein meal plan. Prioritize water throughout the day to optimize bodily functions and support your weight loss goals effectively.
Meal Frequency and Timing
Eating smaller, balanced meals throughout the day can boost metabolism and maintain energy levels. Aim for 5-6 meals, including 3 main meals and 2-3 snacks, spaced evenly. Protein should be distributed evenly across meals to support muscle maintenance. Timing meals around workouts can enhance performance and recovery. Avoid heavy meals close to bedtime to promote better digestion and sleep quality. Consistent meal timing helps regulate hunger hormones, making it easier to stick to the 1600-calorie plan. Adjust timing based on daily schedules to ensure sustainability and adherence to the high-protein diet.

Key Considerations Before Starting the Meal Plan
Consult a healthcare professional, assess personal caloric needs, account for food allergies, and set realistic goals to ensure a safe and effective weight loss journey.
Consulting a Healthcare Professional
Before starting a 1600-calorie high-protein meal plan, consulting a healthcare professional is crucial. They can assess your health status, dietary needs, and ensure the plan aligns with your goals. This step is especially important for individuals with medical conditions or those taking medications. A professional can help tailor the plan to your specific requirements and address potential risks or interactions. Their guidance ensures safety and effectiveness, making the diet more sustainable and personalized for long-term success.
Assessing Individual Caloric Needs
Understanding your daily caloric requirements is crucial for a successful meal plan. Factors like age, weight, activity level, and metabolism influence calorie needs. A 1600-calorie plan may not suit everyone, as it’s tailored for specific weight loss goals, typically for individuals with a lower activity level or smaller body frame. Adjusting portion sizes and protein intake based on personal needs ensures the plan remains effective and sustainable. Consulting a healthcare professional or dietitian can help determine the right balance for your lifestyle and goals, ensuring safety and efficacy in your weight loss journey.
Food Allergies and Preferences
When following a 1600-calorie high-protein meal plan, it’s crucial to account for food allergies and personal preferences. Common allergens like nuts, dairy, shellfish, soy, and gluten must be avoided if necessary. For dairy allergies, opt for alternatives like almond or oat milk. For gluten-free options, choose quinoa or brown rice. Personal preferences, such as vegetarian or vegan diets, can be accommodated by substituting protein sources like eggs, tofu, or legumes. Always ensure substitutions maintain the meal plan’s calorie and protein balance to support weight loss and overall health goals.
Setting Realistic Weight Loss Goals
Setting realistic weight loss goals is crucial for long-term success. Aim for a sustainable loss of 1-2 pounds per week, ensuring the plan aligns with your lifestyle and health needs. This approach avoids extreme deprivation while promoting gradual, maintainable progress. Tracking your journey and adjusting goals as needed helps stay motivated and focused. By balancing calorie control with high protein intake, you create a foundation for steady weight loss without sacrificing nutrition or energy levels. This mindset fosters a healthier relationship with food and exercise, making the 1600-calorie high-protein meal plan a viable long-term strategy.

The 7-Day Meal Plan Overview
This meal plan provides a balanced, high-protein structure, offering daily meals designed to support weight loss and energy stability, with nutrient-rich options for each day of the week.
Day 1: Breakfast, Snacks, Lunch, Dinner, Dessert
- Breakfast: Greek yogurt with berries and a sprinkle of granola (300 calories, 20g protein).
- Snack: Hard-boiled eggs and a handful of almonds (150 calories, 12g protein).
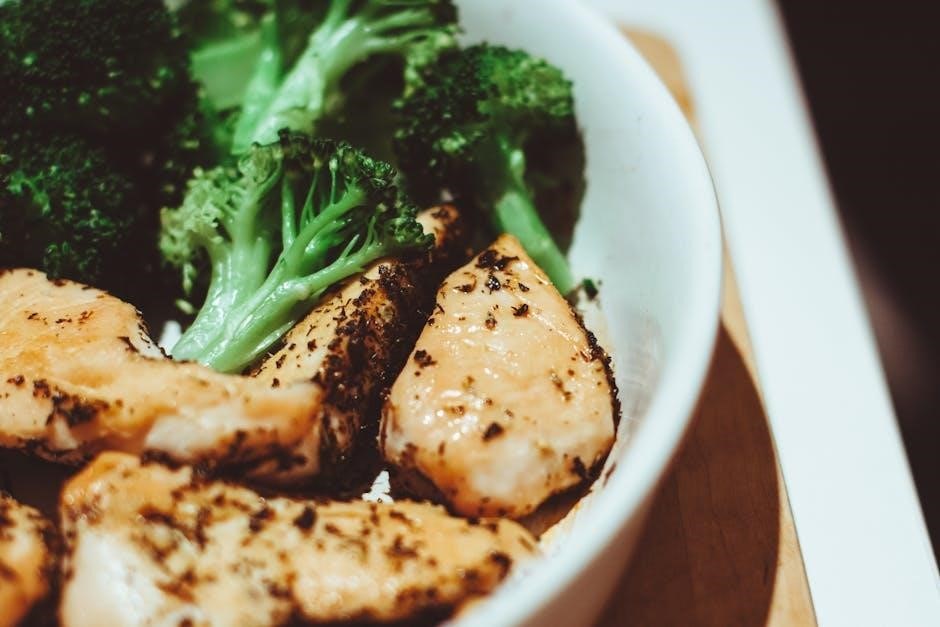
- Lunch: Grilled chicken breast with quinoa and steamed vegetables (400 calories, 40g protein).
- Snack: Protein smoothie with spinach, banana, and almond milk (200 calories, 25g protein).
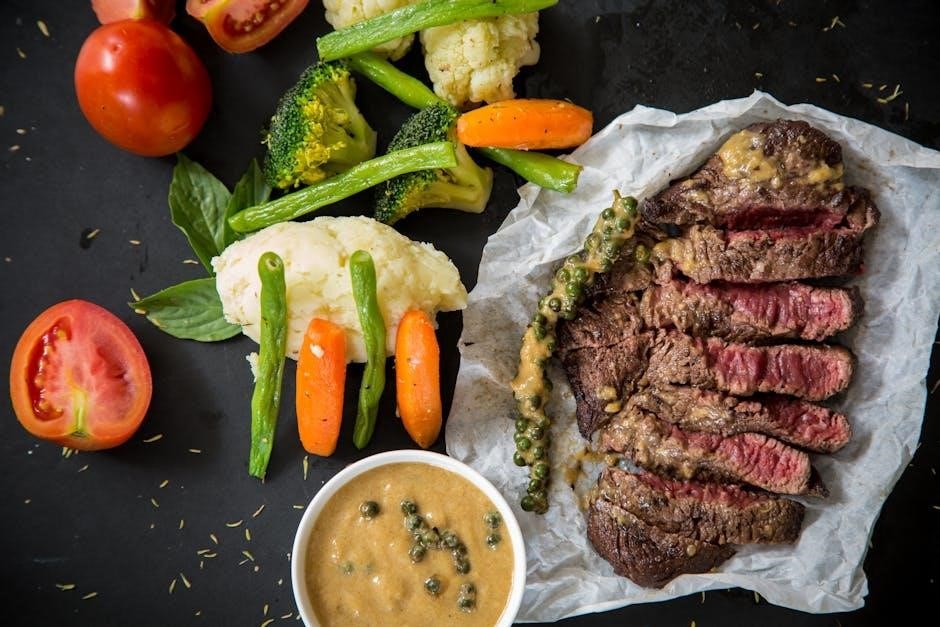
- Dinner: Baked salmon with sweet potato and green beans (350 calories, 35g protein).
- Dessert: Dark chocolate square (100 calories, 2g protein).
Total: 1500 calories, 134g protein.
Day 2: Breakfast, Snacks, Lunch, Dinner, Dessert
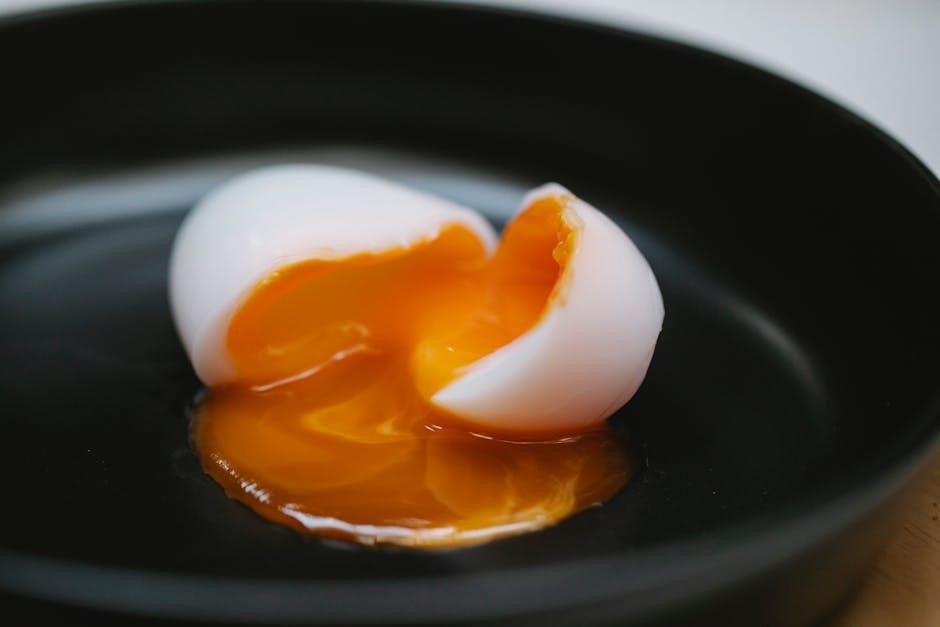
- Breakfast: Avocado toast with a poached egg (250 calories, 14g protein).
- Snack: Cottage cheese with pineapple chunks (120 calories, 15g protein).
- Lunch: Turkey lettuce wraps with hummus (350 calories, 30g protein).
- Snack: Apple slices with peanut butter (150 calories, 8g protein).
- Dinner: Shrimp stir-fry with brown rice (300 calories, 25g protein).
- Dessert: Small portion of dark chocolate (100 calories, 2g protein).
Total: 1570 calories, 94g protein.
Day 3: Breakfast, Snacks, Lunch, Dinner, Dessert
Start with a protein-packed breakfast: scrambled eggs with spinach and whole-grain toast. Mid-morning, enjoy a protein bar (120 calories, 10g protein). Lunch features grilled chicken breast (4 oz, 30g protein) with quinoa and steamed vegetables. Snack on mixed nuts (1 oz, 5g protein). Dinner includes baked salmon (5 oz, 35g protein) with roasted sweet potatoes and green beans. End with dark chocolate (1 oz) for dessert. This day balances protein, fiber, and healthy fats, keeping you full and energized while staying within the 1600-calorie goal.
Day 4: Breakfast, Snacks, Lunch, Dinner, Dessert
- Breakfast: Scrambled eggs with spinach, mushrooms, and whole-grain toast (300 calories, 20g protein).
- Snacks: Greek yogurt with mixed berries and a handful of almonds (200 calories, 15g protein).
- Lunch: Grilled chicken breast salad with mixed greens, avocado, and olive oil vinaigrette (400 calories, 35g protein).
- Dinner: Baked salmon with quinoa and steamed broccoli (500 calories, 30g protein).
- Dessert: Dark chocolate square (100 calories, 2g protein).
Total: 1500 calories, 102g protein. This day focuses on lean proteins, healthy fats, and fiber-rich foods to keep you full and energized.
Day 5: Breakfast, Snacks, Lunch, Dinner, Dessert
- Breakfast: Protein oatmeal with almond butter and chia seeds (350 calories, 25g protein).
- Snacks: Cottage cheese with pineapple and a handful of walnuts (250 calories, 20g protein).
- Lunch: Turkey and avocado wrap with mixed greens (450 calories, 30g protein).
- Dinner: Grilled shrimp with quinoa and roasted vegetables (500 calories, 35g protein).
- Dessert: Protein smoothie with banana and almond milk (150 calories, 15g protein).
Total: 1600 calories, 125g protein. This day emphasizes balanced macronutrients, with a focus on whole grains, lean proteins, and healthy fats to maintain energy levels throughout the day.
Day 6: Breakfast, Snacks, Lunch, Dinner, Dessert
- Breakfast: Scrambled eggs with spinach, mushrooms, and whole-grain toast (300 calories, 20g protein).
- Snacks: Greek yogurt with mixed berries and a handful of almonds (200 calories, 15g protein).
- Lunch: Grilled chicken salad with mixed greens, cherry tomatoes, and olive oil dressing (400 calories, 35g protein).
- Dinner: Baked salmon with roasted sweet potatoes and green beans (500 calories, 40g protein).
- Dessert: Protein bar with dark chocolate chips (100 calories, 10g protein).
This day focuses on lean proteins, complex carbs, and healthy fats to keep energy levels steady while supporting weight loss goals.
Day 7: Breakfast, Snacks, Lunch, Dinner, Dessert
- Breakfast: Greek yogurt with mixed berries and a sprinkle of granola (250 calories, 18g protein).
- Snacks: Hard-boiled eggs and carrot sticks with hummus (150 calories, 12g protein).
- Lunch: Turkey and avocado wrap with whole-grain tortilla (450 calories, 30g protein).
- Dinner: Grilled shrimp with quinoa and steamed broccoli (500 calories, 35g protein).
- Dessert: Protein smoothie with almond milk, banana, and peanut butter (100 calories, 8g protein).
This final day emphasizes balanced meals with a variety of flavors and nutrients, ensuring you meet your protein and calorie goals while enjoying delicious dishes.
Weight Loss and Muscle Maintenance
This meal plan balances calorie control with high protein intake, effectively preserving muscle mass during weight loss. It combines protein and fiber to naturally stabilize blood sugar levels.
How the Meal Plan Supports Weight Loss
This meal plan promotes weight loss by creating a calorie deficit while maintaining muscle mass through high protein intake. Protein helps preserve lean tissue, keeping metabolism high. Balanced with fiber, it stabilizes blood sugar, reducing cravings and overeating. The structured approach ensures nutrient-dense meals, avoiding extreme deprivation, making it sustainable for long-term weight loss goals. Portion control and nutrient timing further enhance fat burning while maintaining energy levels, supporting overall health and gradual, steady weight reduction.
Role of Protein in Muscle Preservation
Protein plays a crucial role in preserving muscle mass during weight loss. It provides essential amino acids that support muscle repair and growth, preventing muscle breakdown. With a high-protein diet, the body maintains lean tissue, ensuring metabolism stays active. Aim for 1.2-1.6 grams of protein per kilogram of body weight daily to protect muscles. This approach not only aids in weight loss but also helps maintain strength and physical performance. Balancing protein intake with a calorie deficit ensures fat loss while preserving muscle, making it a sustainable strategy for long-term health and fitness goals.
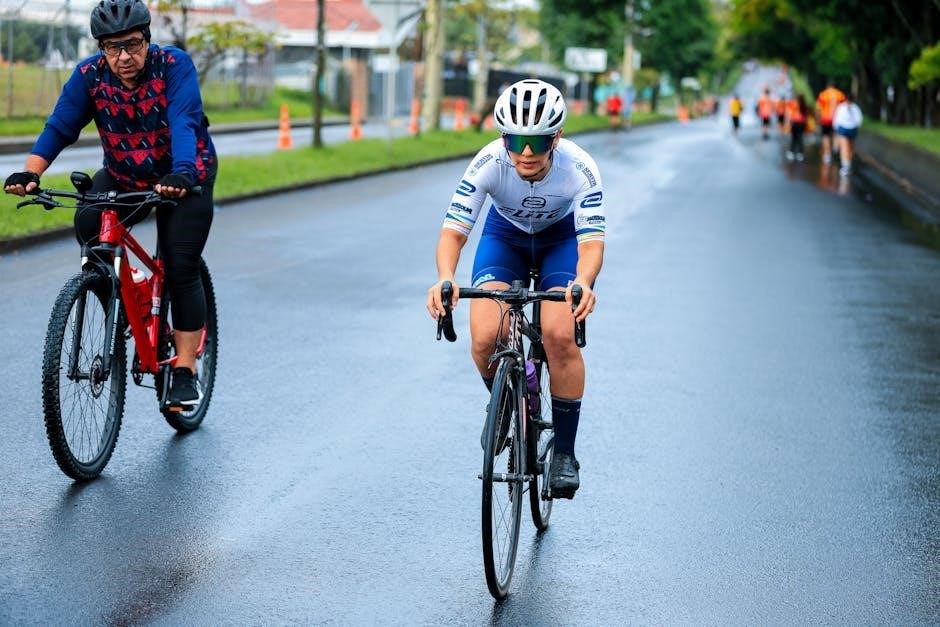
Importance of Exercise
Regular physical activity is crucial for maximizing the benefits of a 1600-calorie high-protein meal plan. Exercise not only burns calories but also enhances metabolism, helping the body maintain muscle mass while shedding fat. Strength training preserves lean tissue, ensuring weight loss comes from fat stores. Cardiovascular exercises improve heart health and boost energy levels. Combining diet with exercise creates a balanced approach, promoting sustainable weight loss and overall well-being. Consistency in physical activity complements the meal plan, ensuring long-term success and better health outcomes.
Tracking Progress
Monitoring your progress is crucial for staying motivated and ensuring the meal plan’s effectiveness. Use a food diary to record daily meals and portion sizes, and track weight loss weekly. Take progress photos and measurements to visualize changes. Adjust the plan as needed to maintain steady progress. Regularly assessing how you feel physically and mentally can also provide insights. Celebrate small milestones to stay encouraged and committed to your goals. Consistent tracking helps identify patterns and areas for improvement, ensuring long-term success on the 1600-calorie high-protein journey.
Common Mistakes to Avoid
Neglecting fiber intake, overconsuming protein, ignoring meal timing, and inadequate hydration are common errors that can hinder progress and overall success of the meal plan.
Neglecting Fiber Intake
Neglecting fiber intake can disrupt digestion, lead to bloating, and reduce feelings of fullness, potentially sabotaging weight loss efforts. A high-protein diet often focuses on lean meats and low-carb foods, but fiber from vegetables, whole grains, and legumes is essential for balanced nutrition. Without adequate fiber, constipation and blood sugar fluctuations may occur, undermining the benefits of the meal plan. Incorporating fiber-rich foods ensures a smoother digestive process and helps maintain stable energy levels, making it easier to adhere to the 1600-calorie high-protein diet long-term.
Overconsumption of Protein
While protein is essential, overconsumption can lead to imbalances. Excessive intake may strain kidneys and cause digestive discomfort. It can also displace other nutrients, potentially leading to deficiencies. Moderation is key to maintaining a balanced diet. Ensure protein intake aligns with individual needs to avoid negative side effects and support overall health goals effectively.
Ignoring Meal Timing
Ignoring meal timing can disrupt metabolic balance and hinder weight loss efforts. Eating irregularly may lead to blood sugar spikes, increased hunger, and poor food choices. A structured schedule helps maintain stable energy levels, preventing overeating and supporting fat burning. Skipping meals or delaying food intake can slow down metabolism and reduce the body’s ability to efficiently use nutrients. Consistent meal timing ensures optimal digestion and nutrient absorption, which are crucial for achieving and maintaining weight loss on a 1600-calorie high-protein diet. Irregular eating patterns can undermine even the most well-planned meal strategies.
Not Drinking Enough Water
Hydration is essential for overall health and weight loss. Water aids digestion, boosts metabolism, and prevents hunger mistaking dehydration for hunger. Even mild dehydration can slow fat burning and energy levels, hindering progress. Drinking enough water supports protein absorption and muscle recovery, crucial for maintaining lean muscle mass. Aim for at least 8 cups daily, adjusting for activity levels. Neglecting hydration can lead to fatigue, poor digestion, and stalled weight loss, undermining the meal plan’s effectiveness. Staying hydrated ensures optimal bodily functions and supports long-term success in your high-protein, 1600-calorie journey.
Sustainability and Long-Term Adherence
This meal plan is designed for sustainable weight loss, avoiding extreme deprivation through balanced nutrition that can be adjusted to individual needs, promoting long-term adherence and motivation.
Meal Prepping Tips
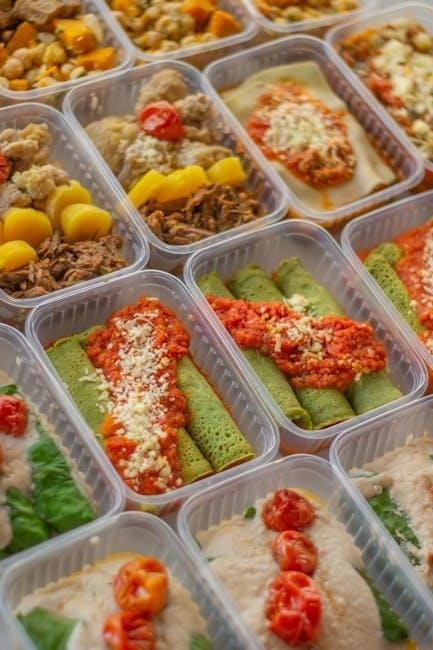
Meal prepping is essential for staying consistent with your 1600-calorie high-protein meal plan. Start by planning your meals for the week, ensuring each dish aligns with your calorie and protein goals. Use reusable containers to portion out breakfast, snacks, lunch, and dinner in advance. Batch cooking proteins like chicken or fish can save time, while pre-chopping vegetables simplifies meal assembly. Schedule prep days to maintain organization and reduce last-minute decisions. Keep meals varied to avoid boredom and stay motivated. Label and date containers for easy tracking, and consider freezing meals for later use. This approach ensures convenience and adherence to your plan.
Staying Motivated
Staying motivated on a 1600-calorie high-protein meal plan requires setting realistic goals and celebrating small victories. Tracking progress, whether through a journal or photos, can help maintain enthusiasm. Surround yourself with a supportive community, such as online forums or friends, to share experiences and gain encouragement. Reward yourself with non-food treats, like new workout gear, to stay positive. Focus on how the plan improves energy and overall health, not just weight loss. Consistency is key, and reminding yourself of long-term benefits will help overcome challenges and keep you committed to your goals.
Adjusting the Plan for Maintenance
Once weight loss goals are achieved, adjusting the 1600-calorie high-protein meal plan for maintenance is crucial. Gradually increase calorie intake to a sustainable level while keeping protein intake high to preserve muscle mass. Incorporate strength training to maintain muscle tone and metabolism. Monitor progress and make small adjustments to portion sizes or food choices as needed. Consistency is key to long-term success, ensuring the plan remains balanced and enjoyable. This approach helps transition from weight loss to a healthy, maintainable lifestyle.
Continuous Learning and Adaptation
Adapting to a 1600-calorie high-protein meal plan requires ongoing education and flexibility. Stay informed about nutrition science, and adjust portions or food choices based on progress. Regularly assess what works and what doesn’t, ensuring the plan aligns with evolving health goals. Engage with resources like meal plan PDFs or online forums for inspiration and guidance. As your body changes, so should your approach, making adjustments to maintain effectiveness and satisfaction. Continuous learning ensures long-term success and prevents plateaus, keeping the journey dynamic and tailored to individual needs;
This 1600-calorie high-protein meal plan offers a balanced approach to weight loss, combining nutrient-dense foods with controlled portions to promote sustainable results and overall well-being.
Final Thoughts on the Meal Plan
The 1600-calorie high-protein meal plan is a balanced approach to weight loss, combining nutrient-dense foods with controlled portions. By focusing on protein and fiber, it helps stabilize energy levels and reduce cravings. The structured 7-day plan provides variety, ensuring meals are satisfying and nutritious. Adjusting portion sizes based on individual needs makes it adaptable for different goals. Consistency is key, as sustainable weight loss requires patience and dedication. This plan not only supports fat loss but also helps maintain muscle mass, promoting overall health and well-being in the long term.
Encouragement for Consistency
Consistency is key to achieving your weight loss and health goals with the 1600-calorie high-protein meal plan. By sticking to the structured approach, you’ll not only see progress but also develop healthier eating habits. Celebrate small victories, like completing a day or trying new recipes, to stay motivated. Remember, patience and persistence are crucial—every meal and snack brings you closer to your desired results. Stay committed, and over time, the plan will become a sustainable lifestyle, helping you maintain weight loss and overall well-being.
Next Steps After Completing the Plan
After finishing the 7-day meal plan, gradually increase calorie intake to maintain weight loss. Continue prioritizing high protein and fiber to sustain energy levels. Incorporate strength training to preserve muscle mass and boost metabolism. Meal prepping can help maintain consistency, while tracking progress ensures accountability. Adjust portion sizes based on individual needs and activity levels. For long-term success, consult a nutritionist to tailor the plan further. Stay hydrated, listen to your body, and explore new recipes to keep meals exciting. Consistency and patience are key to achieving and maintaining your weight loss goals.
Additional Resources
Find the 1600-calorie high-protein meal plan PDF online, explore recommended supplements, join online communities for support, and consult professionals for personalized guidance and accountability.
Where to Find the 1600 Calorie High Protein Meal Plan PDF
Access the 1600-calorie high-protein meal plan PDF through reputable health and fitness websites, nutrition blogs, or official diet platforms. Many resources offer downloadable guides tailored to weight loss and muscle maintenance. Ensure the source is credible and aligns with your dietary needs. Some plans may require registration or subscription, while others are freely available. Always verify the nutritional balance and consult a professional before starting. This PDF serves as a comprehensive guide, helping you stay organized and committed to your health goals.
Recommended Supplements
Consider adding protein powder to boost protein intake effortlessly, especially post-workout or as a meal replacement. A daily multivitamin ensures essential nutrients are met, given the calorie restriction. Fiber supplements can aid digestion and satiety, while omega-3 fatty acids support heart health. Always consult a healthcare provider before starting any supplements to tailor choices to your specific needs and avoid unnecessary additions. These supplements can enhance the effectiveness of the meal plan but should not replace whole foods. Balance and moderation are key to maintaining a healthy and sustainable diet.
Online Communities for Support
Joining online communities can significantly enhance your weight loss journey. Platforms like Chatib, TerraChat, and Chatgratis.org offer spaces to connect with others, share experiences, and gain motivation. These communities provide emotional support, practical advice, and accountability, helping you stay committed to your 1600-calorie high-protein meal plan. Engaging with others who have similar goals fosters a sense of belonging and encourages consistent progress. Participating in these forums can also provide valuable insights and tips, ensuring you stay on track and motivated throughout your journey.
Professional Guidance
Consulting a healthcare professional or registered dietitian is crucial before starting a 1600-calorie high-protein meal plan. They can tailor the plan to your specific needs, ensuring it aligns with your health goals and lifestyle. Experts can also help monitor progress and make adjustments as needed. Additionally, professional guidance ensures the plan is safe and sustainable, especially for those with medical conditions or dietary restrictions. Their expertise provides accountability and helps avoid common pitfalls, making the journey more effective and personalized.
Online resources, such as meal plan PDFs, often include professional tips and structured approaches. These tools, combined with expert advice, can enhance your success and understanding of the plan.