Expert Grill Manual: A Comprehensive Guide
This comprehensive guide provides detailed instructions for assembling, operating, and maintaining your Expert Grill. It covers safety tips, troubleshooting, and care essentials to ensure optimal grilling performance and longevity.
The Expert Grill is a versatile and durable cooking solution designed for outdoor enthusiasts. Available in gas, charcoal, and portable models, it offers high-performance grilling with user-friendly features. The 3-burner and 4-burner propane gas grills are among the most popular, delivering up to 40,000 BTUs of heat across 500-600 square inches of cooking space. These grills are ideal for hosting gatherings or everyday meals, combining power and precision for consistent results. The portable models are perfect for camping or tailgating, providing convenience without compromising on flavor. Constructed with heavy-duty materials, the Expert Grill ensures long-lasting durability and retains heat effectively for even cooking. Whether you prefer gas, charcoal, or a combination, the Expert Grill offers flexibility and reliability, making it a top choice for grillers of all skill levels.
Key Features of the Expert Grill
The Expert Grill stands out with its robust design and advanced features, making it a top choice for outdoor cooking. The 3-burner and 4-burner propane gas grills deliver high heat output, reaching up to 40,000 BTUs, ensuring even cooking across 500-600 square inches of space. The adjustable charcoal pan allows precise temperature control, while heavy-duty cast iron grates retain heat for perfect searing. Portable models are lightweight and compact, ideal for on-the-go use. The grill’s durable construction includes heat shields, warming racks, and grease management systems for convenient cleanup. With options for gas, charcoal, or combo grilling, the Expert Grill offers versatility for diverse cooking preferences. Its user-friendly controls and safety features, such as excess flow regulators, make it both efficient and safe for grilling enthusiasts of all levels.
Why Choose the Expert Grill
The Expert Grill is an excellent choice for outdoor cooking due to its high performance, versatility, and durability. With 3-burner and 4-burner propane gas grills offering up to 40,000 BTUs, it provides consistent heat distribution across 500-600 square inches of cooking space. The grill’s heavy-duty cast iron grates ensure even heat retention for perfect searing. Available in gas, charcoal, and combo models, it caters to diverse cooking preferences, while the portable designs are ideal for tailgating and outdoor adventures. The grill’s grease management system simplifies cleanup, and its robust construction ensures long-lasting use. Enhanced safety features, like excess flow regulators, provide peace of mind. Whether you’re a seasoned griller or a beginner, the Expert Grill delivers a superior cooking experience with ease and reliability, making it a top choice for any grilling enthusiast.

Safety Precautions
Always follow safety guidelines to ensure a secure grilling experience. Keep the grill away from flammable materials, maintain proper clearances, and avoid explosive atmospheres. Never move the grill while in use and always turn off the gas supply after cooking. Safety first to prevent accidents and ensure optimal performance.
Important Safety Information
Always prioritize safety when using your Expert Grill. The grill is designed for outdoor use only and must be placed on a stable, heat-resistant surface. Keep it at least 91.4 cm away from combustible materials like wood, plants, or overhangs. Never use the grill in an explosive atmosphere or near flammable liquids. Ensure the area is clear of leaves, branches, or other flammable debris. Avoid moving the grill while it is in operation, as this can cause accidents. Children and pets should be kept at a safe distance due to the high temperatures generated. After use, always turn off the gas supply at the cylinder and allow the grill to cool before covering or storing it. Failure to follow these guidelines can lead to serious injury or property damage. Remember, safety is paramount to ensure a secure and enjoyable grilling experience.
Proper Grill Placement and Clearances
Proper placement and clearances are essential for safe and efficient grilling. Position the grill on a stable, heat-resistant surface, ensuring it is at least 91.4 cm away from combustible materials like wood, plants, or overhangs. Never place the grill under any type of roof, pergola, or enclosed space, as this can create a fire hazard. Keep the area around the grill clear of leaves, debris, or flammable liquids. Avoid placing the grill near windows or doors to prevent gas fumes or smoke from entering your home. Always ensure the grill is on a level surface to maintain balance and prevent tipping. Minimum clearance requirements must be strictly followed to avoid accidents. Never place the grill near flammable vapors or in an explosive atmosphere, as this poses a significant safety risk. Proper placement ensures a safe and enjoyable grilling experience.
Handling Gas Safely
Handling gas safely is crucial to ensure a secure grilling experience. Always use the regulator and hose assembly provided with your Expert Grill, as they are specifically designed for compatibility and safety. Inspect the hose and regulator before each use for signs of wear, abrasion, or damage. If any damage is detected, replace the parts immediately. Never use flammable liquids or spirits to light the grill, as this can lead to dangerous explosions or fires. Ensure the gas cylinder is properly connected and turned off when not in use. Operating pressure for propane is 37 mbar, and for butane, it is 28-30 mbar. Store gas cylinders upright and outdoors, away from direct sunlight or heat sources. Always turn off the gas supply at the cylinder after grilling. Never operate the grill in an explosive atmosphere or near flammable vapors. By following these guidelines, you ensure safe and efficient grilling while preventing potential hazards.
Assembly Instructions
Begin by unpacking and inventorying all parts. Assemble the base or legs first, ensuring stability. Attach burners, control panels, and heat plates securely. Follow the step-by-step guide in the manual for proper alignment and connection of components. Insert the warming rack and heat plates, then tighten all hardware firmly. Do not move the grill during assembly. Keep the manual handy for reference to ensure all parts are correctly installed for safe and optimal performance.
Unpacking and Inventory of Parts
Start by carefully unpacking your Expert Grill and verifying all components are included. Check for any damage during shipping. The package should contain the grill body, legs, handle, burners, wheels, grease cup, heat plates, warming rack, and hardware kit. Refer to the expanded hardware view in the manual for identification. Ensure no parts are missing or damaged, as this could delay assembly. If any components are missing or compromised, contact customer service immediately. Keep all packaging materials safe until assembly is complete to protect components during the process. Organize parts by category to streamline assembly. Failure to account for all items may result in incorrect or unsafe installation. Always refer to the manual for a detailed inventory list and guidance.
Expanded Hardware View
The expanded hardware view provides a detailed overview of all components included with your Expert Grill. It lists each part, such as the handle, burners, legs, lid, control knobs, wheels, grease cup, heat plates, axle, regulator/hose assembly, hinges, frames, heat shield, and warming rack. Each item is clearly identified and quantified to ensure nothing is missing. This view helps users understand what to expect and verify the completeness of their grill package. Organizing these parts before assembly can streamline the process and prevent delays. Always cross-reference with the manual to ensure all components are accounted for and correctly identified.
Step-by-Step Assembly Process
Begin by assembling the cart frames and side shelves, ensuring all parts are properly aligned and secured. Next, attach the axle and wheels to the frame, followed by the grill body assembly. Install the burners, heat plates, and cooking grids according to the manual’s instructions. Attach the handle, heat shield, and control knobs, making sure they are securely fastened. Insert the warming rack and ensure it is level. Place the grease cup under the grill to collect drippings. Finally, connect the gas regulator and hose to the propane tank, ensuring no leaks. Refer to the expanded hardware view for visual guidance. Double-check all connections and ensure the grill is stable before use. Always follow the manual closely to avoid errors and ensure safety.
Attaching the Gas Regulator and Hose
Attach the gas regulator and hose assembly to the propane tank, ensuring a secure connection. The regulator is designed for use with a 27mm clip-on propane cylinder. Before attaching, turn off the gas cylinder valve. Connect the hose to the regulator and tighten firmly. Inspect for leaks by applying soapy water; bubbles indicate a leak. If no leaks are found, slowly turn on the gas cylinder valve. The regulator features an excess flow safety device, which limits gas flow in case of a leak. Ensure all connections are tight and the system is leak-free before use. Always follow the manual’s instructions for proper installation and safety guidelines. This step is critical for safe and efficient grilling operations.

Operating the Grill
Light the grill by turning the knob and pressing the igniter. Adjust burners for desired heat, using the control knobs. Use cooking modes like direct or indirect heat for optimal results. Always turn off the gas cylinder valve after use to ensure safety.
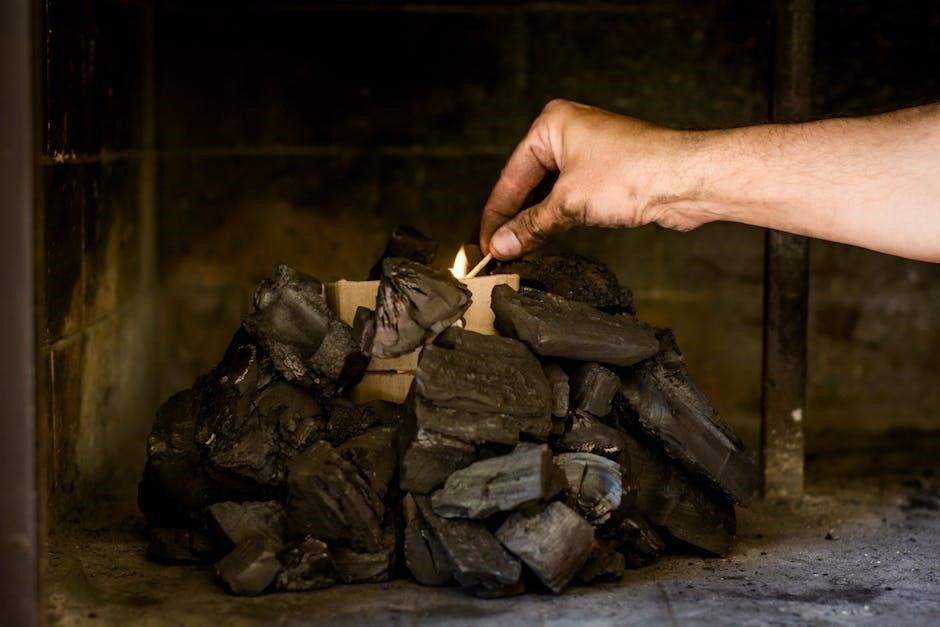
Lighting the Grill
To light your Expert Grill, ensure the gas cylinder valve is fully open. Turn one of the burner control knobs counterclockwise and press the igniter button until it clicks; You should hear the burner ignite. If it doesn’t light immediately, wait a few seconds and try again. Once lit, adjust the flame height by turning the control knob. For multiple burners, repeat the process for each one. Always ensure the grill is preheated for 10-15 minutes before cooking to achieve even heat distribution. If using a match, light it and place it near the burner ports before turning the knob. Never use flammable liquids to light the grill. Keep the area clear of combustible materials and ensure proper ventilation for safe operation.
Controlling Heat and Flame
Controlling heat and flame on your Expert Grill is straightforward using the burner control knobs. Each knob corresponds to a specific burner, allowing precise temperature adjustment. To achieve even heat, preheat the grill with all burners on high for 10-15 minutes. Use the heat plates to distribute heat evenly across the cooking surface. Adjust the burner knobs to low, medium, or high settings based on your cooking needs. For indirect cooking, turn off one or more burners to create a cooler zone. Always ensure the grill is preheated before placing food to avoid uneven cooking. Regularly clean the burner ports and heat plates to maintain consistent flame height and heat distribution. This ensures safe and efficient grilling performance. By mastering heat control, you can achieve perfect searing, roasting, and cooking results every time.
Cooking Modes and Techniques
Your Expert Grill offers versatile cooking modes to suit various culinary needs. For direct grilling, preheat the grill to high heat and place food directly over the flames for a crispy sear. Indirect grilling is ideal for larger cuts of meat; turn off one or more burners to create a cooler zone, allowing slow cooking without direct flame exposure. Use the adjustable heat plates to manage heat distribution and prevent flare-ups. The heavy-duty cast iron grates retain heat exceptionally well, ensuring consistent searing. For smoking, place wood chips in the smoker box (if equipped) and adjust the burners to maintain a low temperature. Experiment with different techniques like rotisserie cooking (on compatible models) for even roasting. By mastering these modes and techniques, you can achieve professional-grade results and explore a wide range of recipes with your Expert Grill;
Turning Off the Grill
To safely turn off your Expert Grill, start by closing the gas cylinder valve. This ensures no additional gas flows to the burners. Next, turn all control knobs clockwise to the “OFF” position. You may hear a slight “poof” sound as any remaining gas in the lines burns off, which is normal. Double-check that all flames are completely extinguished before leaving the grill unattended. For added safety, always disconnect the gas cylinder when the grill is not in use. Regularly inspect the connections and hoses for any signs of wear or damage. Properly turning off the grill helps maintain its longevity and ensures a safe cooking environment. Always follow these steps to avoid potential hazards and keep your grill in optimal condition for future use.
Maintenance and Cleaning
Regular cleaning is essential for optimal performance. Clean grill grates with a wire brush and mild detergent. Remove grease and food residue using a damp cloth. Always store the grill with a UV-resistant cover to protect it from the elements.
Cleaning the Grill Grates
Cleaning the grill grates is crucial for maintaining hygiene and preventing food residue buildup. Start by preheating the grill to burn off excess food particles. Use a sturdy wire brush to scrub the grates, focusing on heavily soiled areas. For tougher residue, mix mild dish soap with warm water and apply to the grates. Let it sit for 10-15 minutes before rinsing with a garden hose. Avoid harsh chemicals or abrasive cleaners that could damage the grates. Regular cleaning prevents rust and ensures even heat distribution. For deep cleaning, soak the grates in a mixture of vinegar and water overnight. Always dry the grates thoroughly after cleaning to prevent rust. Consistent maintenance will extend the lifespan and performance of your Expert Grill.
Managing Grease and Drippings
Effective grease management is essential for both safety and grill maintenance. Your Expert Grill is equipped with a grease cup or tray located underneath the grill to catch drippings. To prevent grease fires and maintain cleanliness, ensure this tray is regularly checked and emptied. Position the heat shield correctly to direct grease away from burners, minimizing flare-ups. For cleaning, use a mixture of mild dish soap and warm water, avoiding harsh chemicals that could damage components. After cleaning, rinse thoroughly and dry to prevent rust. Dispose of grease responsibly, avoiding drains to prevent clogs. Regular maintenance, including post-cooking cleanup and periodic deep cleaning, will enhance your grilling experience and prolong the grill’s lifespan.
Caring for the Exterior
Regular maintenance is crucial for preserving the appearance and durability of your Expert Grill’s exterior. Start by cleaning the outer surfaces with a mild detergent and water, using a soft cloth to avoid scratching. Avoid harsh chemicals, abrasive cleaners, or high-pressure washes, as they can damage the finish. For stainless steel components, a stainless steel cleaner can be used to maintain shine and protect against fingerprints. Painted surfaces should be wiped down gently to prevent chipping.
After cleaning, dry the exterior thoroughly to prevent water spots and rust formation. Inspect for any chips or scratches and apply touch-up paint if needed. Covering the grill when not in use protects it from dust, pollen, and weather conditions. For seasonal deep cleaning, use a grill-specific exterior cleaner to remove stubborn stains or grime. Always follow the manufacturer’s recommendations for cleaning products to ensure optimal results and warranty compliance.
Troubleshooting Common Issues
Address low flame by checking the gas regulator and ensuring the cylinder is not empty. Inspect for gas leaks using soapy water on connections. Resolve other issues by referencing the manual for specific solutions.
Low Flame or No Flame
If your Expert Grill has a low flame or no flame, start by ensuring the gas cylinder valve is fully open. Check if the cylinder is empty or improperly connected. Inspect the regulator for secure attachment to the cylinder. If issues persist, clean the burner ports and venturi tubes, as blockages can restrict gas flow. Ensure the grill is preheated correctly and verify that the control knobs are functioning properly. If the problem remains, consult the troubleshooting section of your manual or contact customer support for assistance. Always follow safety guidelines to avoid potential hazards. Regular maintenance, such as checking for gas leaks and ensuring proper connections, can prevent these issues. Keep the grill area clear of obstructions and flammable materials for safe operation.
Gas Leaks and Odors
If you detect gas leaks or odors while using your Expert Grill, immediately turn off the gas supply and ensure the area is well-ventilated. Check the regulator, hose, and connections for damage or looseness. Apply soapy water to these areas; bubbles indicate a leak. Tighten any loose connections and inspect for wear or abrasion. If the issue persists, replace the damaged parts using only manufacturer-approved components. Regularly inspecting the gas system can help prevent leaks. Always follow safety guidelines, such as keeping flammable materials away and never using the grill in enclosed spaces. If you smell gas but can’t locate the leak, turn off the cylinder and contact a professional. Refer to the manual for detailed troubleshooting steps and ensure all repairs meet safety standards to avoid hazards;
Other Common Problems and Solutions
Besides gas leaks, users may encounter issues like uneven heating or ignition failures. Ensure burners are clean and free of debris, as blockages can disrupt flame distribution. If igniter issues arise, check for dirt or moisture and clean the igniter electrode. For grease-related problems, regularly empty the drip tray and clean the grease cup to prevent flare-ups. If the grill doesn’t heat evenly, adjust the burner knobs to balance the flame. Always ensure proper ventilation to avoid carbon monoxide buildup. For persistent issues, refer to the troubleshooting section in the manual or contact customer support. Regular maintenance, such as cleaning heat plates and grates, can prevent many common problems. Addressing these issues promptly ensures safe and efficient grilling. Always follow the manufacturer’s guidelines for repairs and replacements to maintain your grill’s performance and longevity.

Warranty and Support
Expert Grill products are backed by a limited warranty covering defects in materials and workmanship. Register your grill for extended support and access to dedicated customer service. Visit the official website for detailed warranty terms, FAQs, and contact information to assist with any inquiries or repairs. Proper registration ensures optimal support and maintenance for your grilling experience.
Warranty Information
Your Expert Grill is protected by a limited warranty that covers defects in materials and workmanship for a specified period. The warranty typically covers repair or replacement of defective parts, provided the grill has been used and maintained in accordance with the manufacturer’s instructions. Registration of your grill is often required to activate the warranty benefits. For detailed terms and conditions, including warranty duration and exclusions, refer to the officialExpert Grill website or contact their customer service team. Proper maintenance and adherence to safety guidelines are essential to ensure warranty validity. In case of issues, contact the manufacturer for assistance with repairs or replacements under warranty coverage.
Customer Service and Contact
For any questions, concerns, or assistance with your Expert Grill, contact our dedicated customer service team. Visit the official Expert Grill website to find detailed contact information, including phone numbers, email addresses, and a support form. Customer service representatives are available to assist with inquiries about grill operation, maintenance, warranty claims, and replacement parts. Additionally, the website offers a comprehensive FAQ section and downloadable resources, such as manuals and troubleshooting guides, to help resolve common issues. For urgent matters, call the customer service hotline during business hours. International customers can also reach out through the provided contact channels. Ensure to have your grill model number and purchase details ready for efficient support. Expert Grill is committed to providing excellent service to ensure your grilling experience is enjoyable and hassle-free.