Discover the art of building a wood-fired oven with free PDF plans, guiding you through traditional Italian designs, DIY projects, and essential materials for authentic cooking experiences.
Overview of Wood Fired Ovens
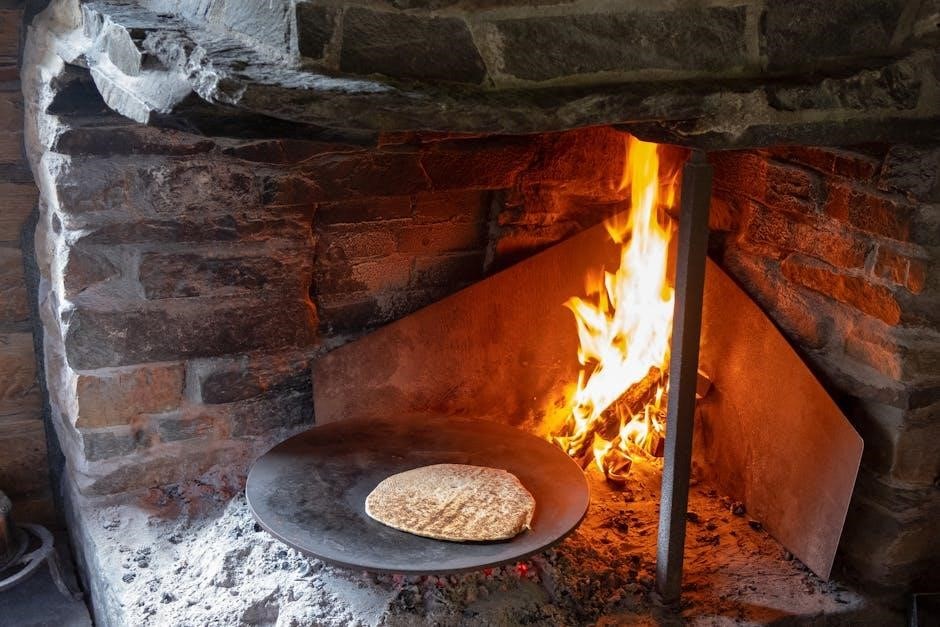
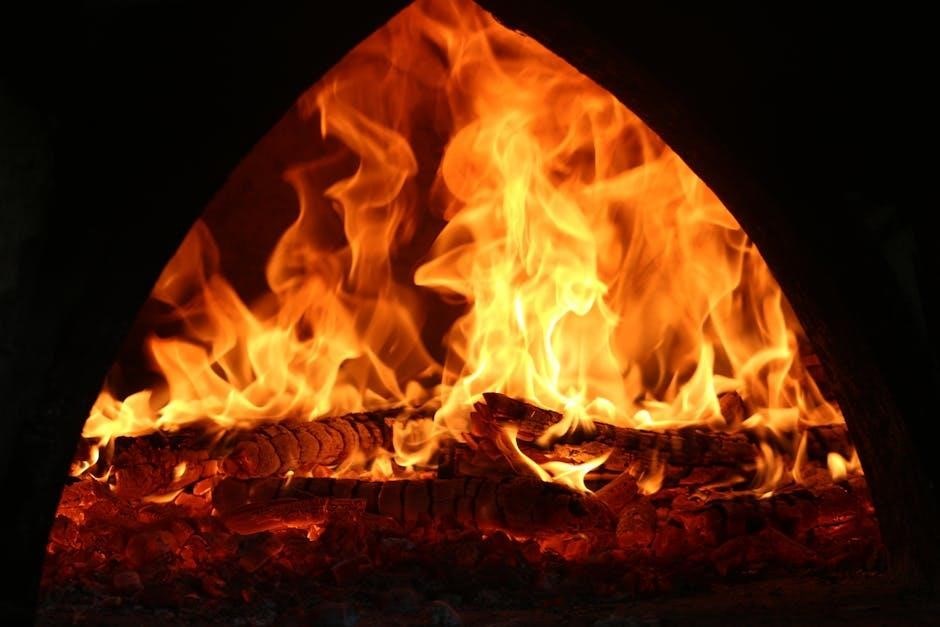
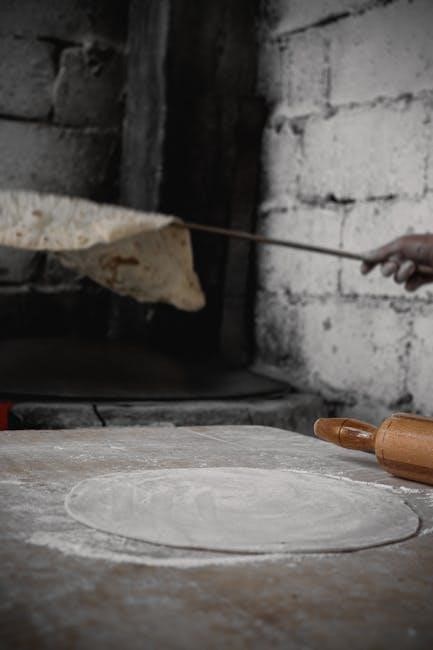
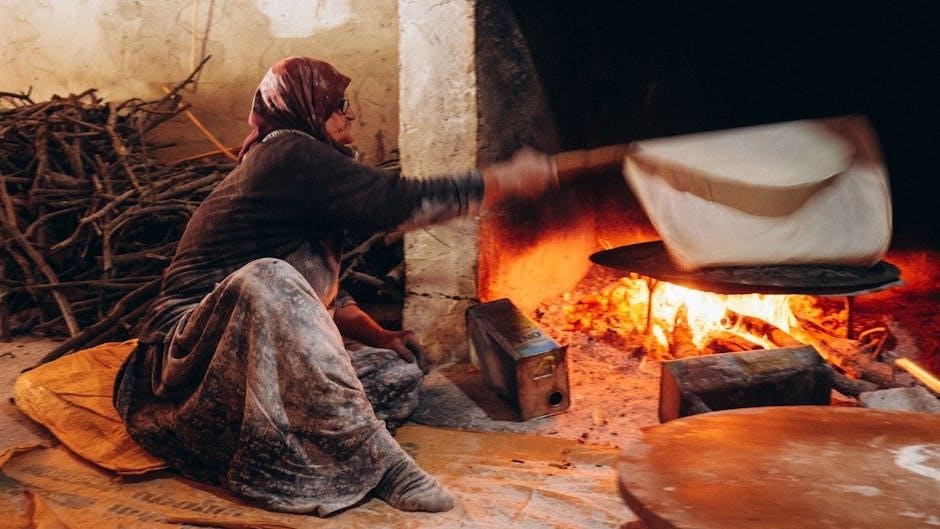
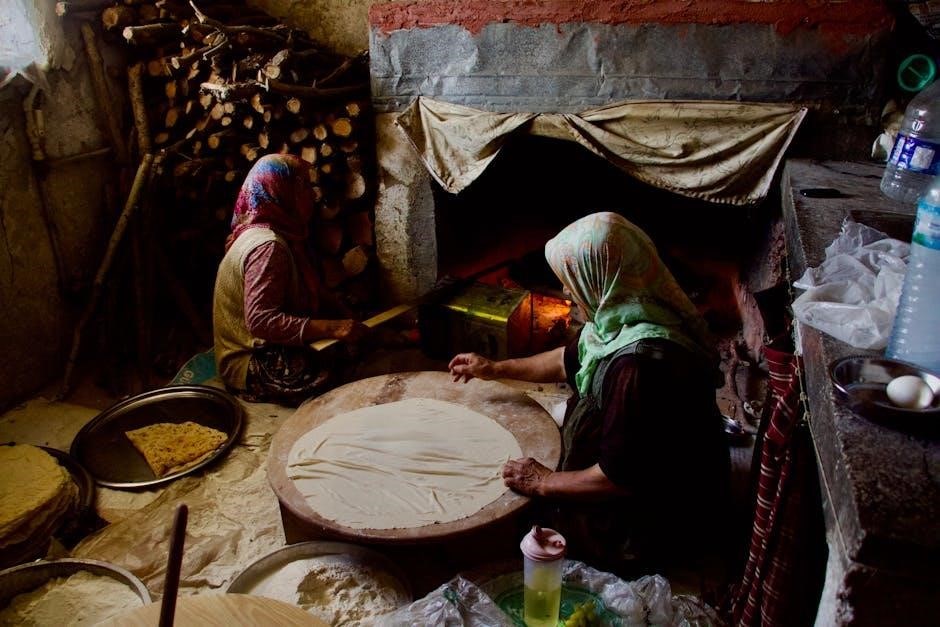
Wood-fired ovens are traditional cooking structures that use wood as fuel for heat, offering a unique and flavorful way to prepare meals. These ovens are typically built with firebricks and insulated to retain heat, allowing for efficient cooking. They are versatile, suitable for baking bread, roasting meats, and cooking pizzas. The design often reflects Italian heritage, with a dome-shaped structure that promotes even heat distribution. Wood-fired ovens can be integrated into outdoor kitchens, making them a popular choice for entertaining. Whether for casual gatherings or professional use, these ovens provide an authentic cooking experience that combines tradition with modern functionality.
Importance of Using PDF Plans
Using PDF plans for building a wood-fired oven is essential for a successful project. These plans provide detailed, step-by-step instructions, material lists, and design layouts, ensuring clarity and precision. They often include diagrams and measurements, making complex construction processes manageable for DIY enthusiasts. PDF plans are easily downloadable and accessible, allowing users to refer to them repeatedly without losing information. Whether you’re building a traditional Italian brick oven or a modern design, PDF guides offer a comprehensive roadmap, helping you achieve professional results. They are invaluable for ensuring accuracy, saving time, and avoiding costly mistakes during construction.
Benefits of Building a Wood Fired Oven
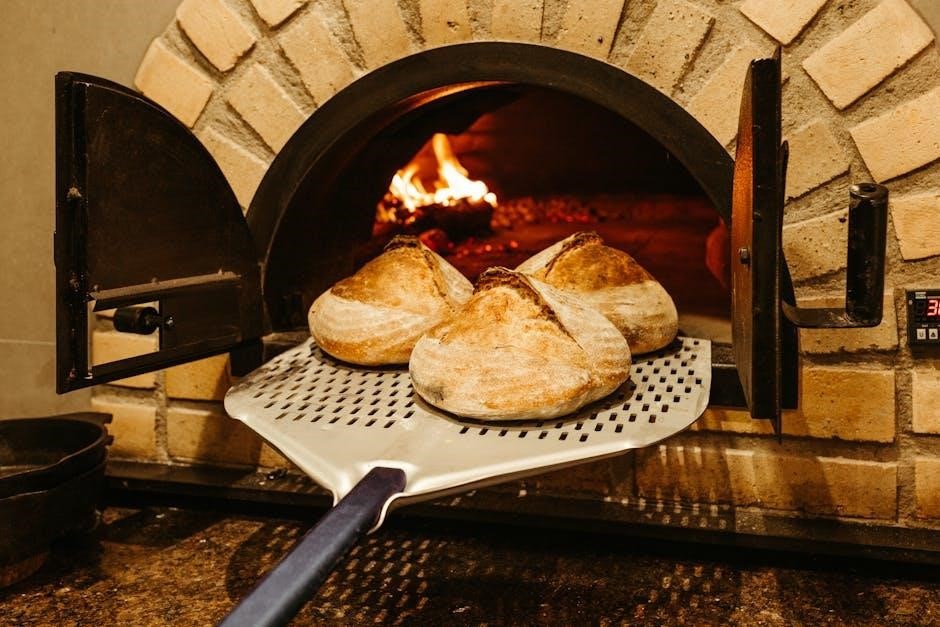
Building a wood-fired oven offers numerous benefits, enhancing both your cooking experience and outdoor living space. It allows for authentic, smoky flavors in dishes like pizza and bread, which are hard to replicate with conventional ovens. The oven becomes a focal point for social gatherings, creating memorable experiences with family and friends. Additionally, a well-constructed oven can increase your property’s value and serve as a sustainable cooking option. With proper maintenance, it can last for decades, providing years of enjoyment; The process of building it also fosters a sense of accomplishment and connection to traditional craftsmanship.
Design and Types of Wood Fired Ovens
Explore various wood-fired oven designs, from traditional Italian brick models to modern pizza ovens, each offering unique features for cooking and outdoor kitchen integration.
Traditional Italian Brick Oven Design
The traditional Italian brick oven, inspired by the Pompeii design, is a classic choice for wood-fired cooking. Built with firebricks and a reinforced concrete foundation, it features a domed shape for optimal heat retention and circulation. The oven’s structure includes a cooking floor, dome, and chimney, ensuring efficient ventilation. PDF plans often detail this design, guiding DIY enthusiasts through layering bricks and insulating the dome. Ideal for both home and professional use, this design is celebrated for its authenticity and ability to produce delicious, smoky dishes. Its timeless appeal makes it a popular choice for outdoor kitchens and pizzerias alike.
Modern Wood Fired Pizza Oven Designs
Modern wood-fired pizza oven designs blend traditional functionality with sleek, contemporary aesthetics. These ovens often feature compact shapes, minimalistic exteriors, and innovative materials like stainless steel or refractory insulation. They are designed for efficiency, with improved airflow and heat retention, allowing for faster cooking times. Some models incorporate modular components, making them easier to install in outdoor kitchens. PDF plans for these designs frequently include step-by-step instructions, catering to both DIY enthusiasts and professionals. Whether integrated into a patio or freestanding, modern wood-fired ovens offer a perfect balance between performance and style, making them a versatile choice for various cooking needs and spaces.
Bread Oven vs. Pizza Oven: Key Differences
Bread ovens and pizza ovens differ in design and purpose. Bread ovens are larger, with thicker walls for extended heat retention, ideal for slow cooking and baking. Pizza ovens are smaller, designed for high-heat, quick cooking. Bread ovens often feature an oval shape for even heat distribution, while pizza ovens are typically round or domed for focused heat. Construction materials vary slightly, with bread ovens requiring heavier insulation. PDF plans highlight these distinctions, ensuring builders choose the right design for their needs. Whether for crusty bread or crispy pizzas, understanding these differences is crucial for optimal performance and cooking results.
Outdoor Kitchen Integration Ideas
Integrating a wood-fired oven into an outdoor kitchen enhances both functionality and aesthetics; Consider placing the oven as a centerpiece, surrounded by countertops and storage for utensils. Incorporate seating areas nearby to create a gathering space. Pair the oven with a grill or smoker for versatile cooking options. Use matching materials, like stone or brick, to blend the oven seamlessly with the surroundings. Lighting around the oven can highlight its design and extend cooking hours. PDF plans often include layouts that maximize space and create a cohesive outdoor cooking area, perfect for entertaining family and friends year-round.
Essential Components of a Wood Fired Oven
Key components include firebrick construction, insulation for heat retention, a chimney system for ventilation, and a reinforced concrete foundation for stability and durability in outdoor settings.
Firebrick Construction: Materials and Tools
Firebrick construction is central to building a durable wood-fired oven. High-temperature firebricks are essential for withstanding extreme heat, while specialized tools like brick trowels and levels ensure precise layering. A mixture of sand and cement creates a sturdy mortar, bonding the bricks securely. Properly sourced materials guarantee longevity and heat resistance. Detailed plans guide the layout, ensuring each brick is perfectly aligned and level. This step requires patience and skill to achieve a structurally sound and efficient oven core.
Insulation: Key to Heat Retention
Insulation is vital for maintaining consistent temperatures in a wood-fired oven. High-quality refractory insulation materials, such as ceramic blankets or vermiculite, are used to line the oven’s interior and surround the dome. Proper insulation ensures minimal heat loss, allowing the oven to retain high temperatures for extended cooking periods. This not only improves cooking efficiency but also reduces fuel consumption. Detailed plans often specify the thickness and placement of insulation layers to maximize heat retention. Without adequate insulation, the oven’s performance would suffer, making it less effective for baking bread or cooking pizza.
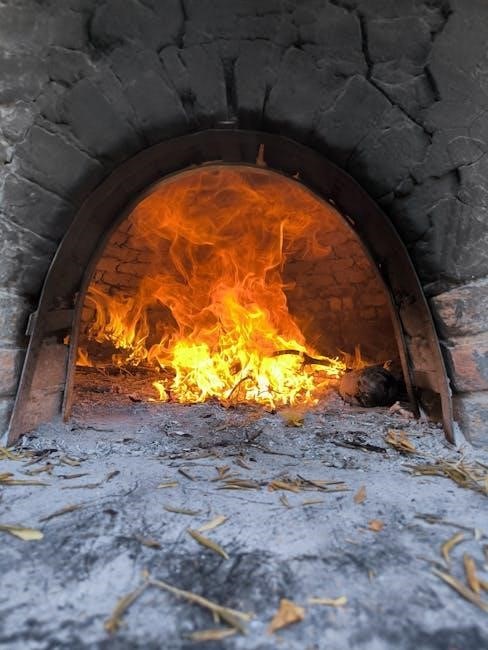
Chimney and Ventilation Systems
A well-designed chimney and ventilation system are crucial for efficient operation of a wood-fired oven. The chimney ensures proper airflow, directing smoke away from the cooking area while maintaining internal pressure. Proper ventilation prevents smoke buildup and ensures complete combustion of wood, enhancing cooking efficiency. Plans typically specify chimney size, height, and material, often recommending stainless steel or refractory-lined chimneys for durability. Correct installation ensures safety and optimal performance, preventing harmful fumes from accumulating. Detailed instructions in PDF plans guide the placement and construction of these systems to meet safety standards and improve overall oven functionality.
Reinforced Concrete Foundation Requirements
A sturdy reinforced concrete foundation is essential for a wood-fired oven, ensuring durability and stability. Plans typically specify a 100mm thick concrete slab, with the finished level about 50mm above ground to prevent water runoff. This elevation also serves as a base for the oven and wood storage. The foundation must be constructed with reinforced concrete to support the oven’s weight and withstand heat exposure. Properly poured and cured concrete ensures a solid base, preventing structural issues. Detailed PDF plans provide step-by-step instructions for mixing, pouring, and finishing the slab, ensuring a reliable foundation for your wood-fired oven project.
Construction Process: Step-by-Step Guide
Building a wood-fired oven involves key steps: preparing the foundation, layering the hearth, constructing the dome, and installing the door and chimney. PDF plans offer detailed guidance for each phase.
Preparing the Foundation: Concrete Slab Construction
The foundation is a critical starting point for your wood-fired oven. A 100 mm thick concrete slab is recommended, with a finished level about 50 mm above ground to prevent water runoff. Ensure the slab is level and evenly spread to support the oven’s weight. Use reinforced concrete for strength and durability. Proper drainage and a slight slope can prevent water accumulation. The slab should only cover the oven’s floor area, with pavers added later. A well-prepared foundation ensures stability and longevity for your oven. Follow PDF plans for precise measurements and mixing guidelines to achieve a sturdy base.
- 100 mm thick concrete slab
- 50 mm above ground level
- Reinforced for strength
- Level and even surface
Building the Hearth: Layering and Leveling
Constructing the hearth involves layering heat-resistant materials to create a sturdy base for your wood-fired oven. Begin with a layer of firebricks, ensuring they are evenly spaced and level. Next, add insulation to enhance heat retention. Use a spirit level to ensure each layer is perfectly aligned. Proper leveling prevents uneven heat distribution and ensures structural integrity. Follow PDF plans for specific material thickness and arrangement. Allow each layer to set before proceeding to the next. This step requires precision to guarantee optimal performance and longevity of your oven. Detailed guidance in the plans will help you achieve a professional finish.
- Firebrick base layer
- Insulation for heat retention
- Spirit level for accuracy
- Even spacing and alignment
Constructing the Dome: Brick Layout and Shaping
Building the dome of your wood-fired oven requires precise brick layout and shaping to achieve the desired structure; Start by planning the dome’s shape, whether round or oval, using a template for accuracy. Firebricks are arranged in a circular pattern, with each layer slightly smaller than the last to form the dome. Use high-temperature mortar to secure the bricks, ensuring tight joints for heat retention. As you progress, shape each brick to fit seamlessly, potentially cutting bricks to achieve the perfect curve. Maintain proper alignment and stability by using a level and plumb line. Allow each layer to set before adding the next, ensuring structural integrity. A small opening at the top will later house the chimney, completing the dome’s formation.
- Use firebricks for the dome structure
- Apply high-temperature mortar
- Shape bricks to fit the curve
- Ensure proper alignment and stability
Installing the Door and Chimney
Installing the door and chimney is a critical step in your wood-fired oven project. The door frame is typically constructed from steel and set into the brickwork, ensuring a proper seal to retain heat. Use high-temperature mortar to secure the door frame and ensure it fits snugly within the opening. The chimney, often positioned at the top of the dome, directs smoke away efficiently. Install it using heat-resistant materials and ensure it aligns with local building codes. Proper installation ensures safe and efficient operation of your oven. Follow detailed plans for precise measurements and alignment to achieve optimal performance.
- Use high-temperature mortar for the door frame
- Ensure proper sealing to retain heat
- Position the chimney at the dome’s top
- Align with local building codes
Safety Considerations and Best Practices
Ensure fire safety by keeping flammable materials away and using heat-resistant components. Proper ventilation prevents smoke buildup, while regular maintenance ensures efficient and safe oven operation always.
Fire Safety Tips for Wood Fired Ovens
Ensure your wood-fired oven is placed on a fire-resistant surface, away from flammable materials. Keep a fire extinguisher nearby and maintain a safe distance from trees or structures. Regularly inspect the chimney for blockages and clean it to prevent creosote buildup, which can cause fires. Never leave the oven unattended while burning wood, and store fuel in a dry, secure location. Proper ventilation is crucial to avoid carbon monoxide accumulation. Always follow local fire safety regulations and consider installing a spark guard to contain embers. Safe operation ensures enjoyable and hazard-free cooking experiences year-round.
Proper Ventilation to Prevent Smoke Build-Up
Effective ventilation is essential for safe and efficient operation of wood-fired ovens. A well-designed chimney ensures smoke exits properly, preventing buildup in the cooking area. Install a chimney tall enough to clear surrounding structures, enhancing airflow and reducing smoke accumulation. Use high-quality flue liners to maintain consistent airflow and prevent damage from heat. Regular cleaning of the chimney and flue is crucial to remove soot and creosote, which can obstruct ventilation. Proper ventilation not only improves cooking performance but also reduces the risk of carbon monoxide exposure, ensuring a safer and more enjoyable cooking environment for outdoor gatherings and culinary projects.
Heat-Resistant Materials and Their Importance
Heat-resistant materials are critical for constructing a durable and safe wood-fired oven. Firebricks, high-temperature mortar, and refractory insulation are essential components that withstand extreme heat without degrading. Firebricks line the oven’s interior, absorbing and retaining heat for consistent cooking. Insulation, such as ceramic fiber blankets, prevents heat loss and protects the exterior from excessive temperatures. A reinforced concrete foundation ensures stability and supports the oven’s weight. Using these materials ensures optimal performance, longevity, and safety, preventing cracks and damage from thermal stress. Proper selection and installation of heat-resistant materials are vital for a functional and long-lasting wood-fired oven.
Tools and Materials Required
- Firebricks: Essential for withstanding high temperatures and retaining heat.
- High-temperature mortar: Bonds bricks securely in extreme heat conditions.
- Refractory insulation: Prevents heat loss and protects the structure.
- Specialized trowels: For precise mortar application and brick placement.
- Safety gear: Heat-resistant gloves and goggles for protection.
Specialized Tools for Bricklaying
Building a wood-fired oven requires specific tools for precise bricklaying. Essential tools include a brick trowel for applying mortar, a level to ensure even layers, and a jointer for finishing mortar joints. A brick hammer helps shape bricks to fit perfectly. These tools ensure proper alignment and bonding, crucial for heat retention and durability. Proper use of these tools is vital for a successful oven build.
High-Temperature Mortar and Its Application
High-temperature mortar is a critical component in building a wood-fired oven, designed to withstand extreme heat without cracking. Made from refractory materials like fireclay and cement, this mortar ensures a durable bond between firebricks. Proper mixing and application are essential to maintain heat resistance. Apply thin layers using a trowel, pressing firmly to eliminate air pockets. Allow each layer to set before proceeding. This specialized mortar is vital for maintaining structural integrity and heat retention in the oven, ensuring safe and efficient cooking performance over time. Its durability is key to the oven’s longevity and functionality.
Refractory Insulation: What You Need to Know
Refractory insulation is a crucial element in wood-fired oven construction, ensuring efficient heat retention and reducing fuel consumption. This high-temperature material, often made from ceramic fibers or vermiculite, lines the oven’s interior and surrounds the cooking chamber. Proper installation involves layering insulation materials to create a thermal barrier, preventing heat loss. It also protects the outer structure from extreme temperatures. Without adequate insulation, the oven would lose heat quickly, making cooking less efficient. Selecting the right refractory insulation is essential for optimal performance, safety, and durability of your wood-fired oven. It’s a key factor in achieving consistent cooking results and extending the oven’s lifespan.
Maintenance and Troubleshooting
Regular cleaning and inspection are vital for extending the oven’s lifespan. Addressing cracks and ensuring proper ventilation prevents smoke buildup and maintains optimal cooking performance.
Cleaning and Seasoning Your Oven
Cleaning your wood-fired oven regularly is essential for maintaining its performance and longevity. Start by brushing the interior with a stiff brush to remove soot and debris. For tougher stains, mix a mild detergent with water and apply it to the affected areas before rinsing thoroughly. Avoid harsh chemicals, as they can damage the brick or mortar. Seasoning the oven involves applying a natural oil, like olive or linseed oil, to the exterior to protect it from weathering. Repeat this process annually, especially in areas with harsh weather conditions. Regular maintenance prevents rust and extends the oven’s lifespan.
Common Issues and How to Fix Them
One common issue with wood-fired ovens is poor heat retention, often due to insufficient insulation. To resolve this, ensure the oven is well-insulated with refractory materials. Another issue is smoke entering the cooking area, which can be fixed by adjusting the chimney height or improving ventilation. Cracks in the brickwork can be repaired with high-temperature mortar, preventing further damage. Regular maintenance, such as cleaning and seasoning, helps prevent these issues from arising. Always refer to your PDF plans for specific troubleshooting guides to ensure your oven performs optimally and lasts for years.
Extending the Lifecycle of Your Oven
To extend the lifecycle of your wood-fired oven, regular maintenance is crucial. Ensure the exterior is protected from weather by sealing any cracks with high-temperature mortar. Seasonal cleaning and inspections help prevent damage from soot buildup. Insulate the oven properly to retain heat and reduce stress on the structure. Store firewood correctly to avoid moisture issues. Follow the PDF plans for recommended materials and techniques to ensure durability. Proper care and timely repairs will keep your oven functioning efficiently for years, providing endless cooking enjoyment and becoming a lasting addition to your outdoor space.
Advanced Techniques for Wood Fired Ovens
Master advanced techniques like optimizing heat distribution, enhancing cooking efficiency, and customizing oven designs for superior performance and personalized culinary experiences using detailed PDF plans.
Optimizing Heat Distribution
Optimizing heat distribution in wood-fired ovens ensures even cooking and maximizes efficiency. The Pompeii-style oven design, with its domed shape and strategically placed ventilation, naturally enhances heat circulation. Firebrick construction and proper insulation play crucial roles in retaining and distributing heat evenly. Preheating the oven thoroughly and using a thermal mass, like refractory materials, helps maintain consistent temperatures. Additionally, strategically placing food and using tools like turning peels can improve heat utilization. Regular maintenance, such as cleaning and inspecting the chimney, ensures optimal airflow. By following these techniques, you can achieve uniform cooking results and elevate your culinary experience with wood-fired ovens.
Enhancing Cooking Efficiency
Enhancing cooking efficiency in wood-fired ovens involves careful planning and execution. The use of high-quality firebricks and insulation ensures consistent heat retention, reducing fuel consumption. Proper chimney design improves airflow, allowing for better combustion and efficient heat distribution. Preheating the oven to the optimal temperature before cooking is crucial for even results. Additionally, using a thermal mass, such as refractory materials, helps maintain stable temperatures during cooking. Regular maintenance, like cleaning the oven and ensuring proper ventilation, also contributes to efficient performance. By following these strategies, you can maximize your oven’s efficiency and achieve superior cooking outcomes with minimal effort.
Customizing Your Oven Design
Customizing your wood-fired oven design allows you to tailor it to your preferences and needs. Free PDF plans often include flexible layouts, enabling you to adjust dimensions, shapes, and features. Consider adding a decorative arch, incorporating a cooking surface for multiple dishes, or integrating a wood storage area. Advanced techniques, such as enhancing insulation or modifying the chimney design, can further personalize your oven. You can also experiment with exterior finishes, like stucco or tile work, to match your outdoor space. DIY projects and professional builds alike benefit from these customization options, ensuring your oven is both functional and aesthetically pleasing.
Case Studies and Success Stories
Explore inspiring case studies of successful DIY and professional wood-fired oven builds. These stories highlight the pride and satisfaction of creating functional and beautiful outdoor cooking spaces.
DIY Projects: Lessons Learned
Diy enthusiasts share insights from their wood-fired oven journeys. Proper planning, precise measurements, and patience are key. Many highlight the importance of using high-quality materials and following detailed pdf plans to ensure durability and performance. Beginners often underestimate the need for a sturdy foundation, while others emphasize the value of insulation for heat retention. Seasoning the oven correctly is another crucial step to prevent cracking. These lessons learned offer practical advice for those embarking on their own diy projects, helping to avoid common pitfalls and achieve a successful, long-lasting wood-fired oven.
Professional Builds: Insights and Tips
Professional builders emphasize the importance of precision and quality materials when constructing wood-fired ovens. Using high-temperature refractory materials and proper insulation ensures optimal performance. Many recommend following detailed pdf plans to achieve authentic results, such as the traditional Italian Pompeii oven design.Seasoning the oven correctly after construction is crucial for durability. Experts also stress the need for a well-ventilated chimney system to enhance airflow and heat distribution. Consulting with experienced builders or using professional-grade plans can help overcome challenges like achieving the perfect dome shape and ensuring structural integrity. Their insights provide valuable tips for achieving a professional-grade wood-fired oven at home.
Wood-fired oven plans offer a gateway to creative cooking and outdoor entertaining. With detailed PDF guides, building your dream oven is achievable, promising delicious results and lasting satisfaction.
Summarizing the Benefits of Wood Fired Ovens
Wood-fired ovens offer unparalleled cooking experiences, delivering authentic flavors and textures. They enhance outdoor entertainment, fostering gatherings and memorable meals. Building one provides a rewarding DIY project, combining creativity with functionality. These ovens are versatile, suitable for pizza, bread, and various dishes, while promoting sustainable cooking with renewable fuel sources. The traditional charm and modern efficiency of wood-fired ovens make them a valuable addition to any home, offering lasting enjoyment and culinary satisfaction. Whether for personal use or entertaining, they promise a delightful blend of tradition, flavor, and community connection, making them a worthwhile investment for cooking enthusiasts.
Encouraging Readers to Start Their Project
Ready to embark on a rewarding DIY adventure? Building a wood-fired oven is a fulfilling project that combines creativity and practicality. With free PDF plans available, you can easily access step-by-step guides to construct your own oven. Don’t let initial doubts hold you back—many have successfully built their ovens using these plans. Imagine the satisfaction of cooking delicious meals for family and friends in your very own wood-fired oven. The process is manageable, and the results are well worth the effort. Download the plans today, gather your materials, and start crafting a culinary centerpiece that will bring joy for years to come!