Bosch Serie 8 Dishwasher Manual: A Comprehensive Guide
Discover detailed instructions for your Bosch Serie 8 dishwasher (SMS88UW06G), covering installation, operation, and troubleshooting. This guide, rated highly by users, ensures optimal performance.
Welcome to the world of advanced dishwashing with your Bosch Serie 8 dishwasher! This appliance represents a pinnacle of innovation, combining cutting-edge technology with exceptional cleaning performance. The Serie 8 range is designed for those who demand the very best in home appliances, offering a seamless blend of convenience, efficiency, and quiet operation.
This manual serves as your comprehensive guide to understanding and utilizing all the features of your dishwasher, specifically the SMS88UW06G model. Whether you’re a first-time user or a seasoned Bosch owner, this resource will provide you with the knowledge to maximize its potential. From initial setup and loading techniques to navigating the control panel and troubleshooting common issues, we’ve covered everything you need to know.
Bosch prioritizes both performance and sustainability. The Serie 8 dishwashers are engineered to deliver sparkling clean results while minimizing water and energy consumption. This manual will also detail how to optimize these features for an eco-friendly and cost-effective experience. Prepare to enjoy consistently superior cleaning and a remarkably quiet kitchen environment!
Understanding the Control Panel
The Bosch Serie 8 dishwasher’s control panel is intuitively designed for ease of use, offering a range of options to customize your wash cycle. The panel features a clear display indicating the selected program, remaining time, and any active modifications. Familiarize yourself with the buttons and symbols to unlock the full potential of your appliance.
Key elements include the program selection buttons – offering choices like Intensive, Eco, Normal, and Quick Wash – alongside options for Rinse and Dry. Dedicated buttons allow for adjustments like Extra Rinse, Pre-Rinse, SensorDry, and Extra Drying. A ‘Start’ button initiates the chosen cycle, while a ‘Reset’ function allows for quick program cancellation.
The display also communicates important information through error codes (0-8), signaling potential issues requiring attention. Holding the button for approximately three seconds saves your preferred settings for future use. Understanding these controls empowers you to tailor each wash to your specific needs, ensuring optimal cleaning and efficiency.
Initial Setup and Installation Instructions
Proper installation is crucial for optimal Bosch Serie 8 dishwasher performance. Begin by carefully unpacking the appliance and verifying all components are present. Before connecting to power, ensure the dishwasher is level and securely positioned, following domestic appliance installation guidelines.
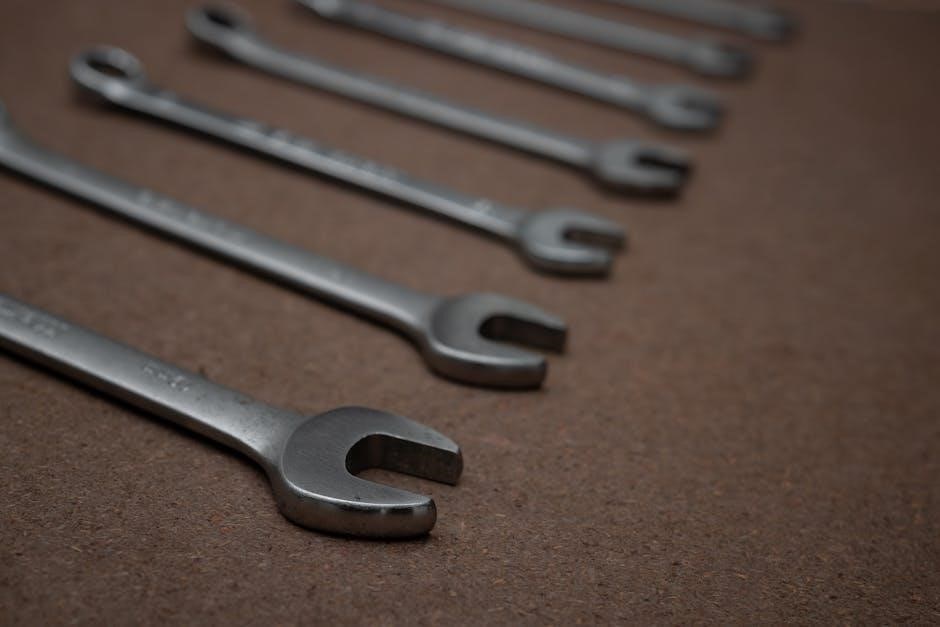
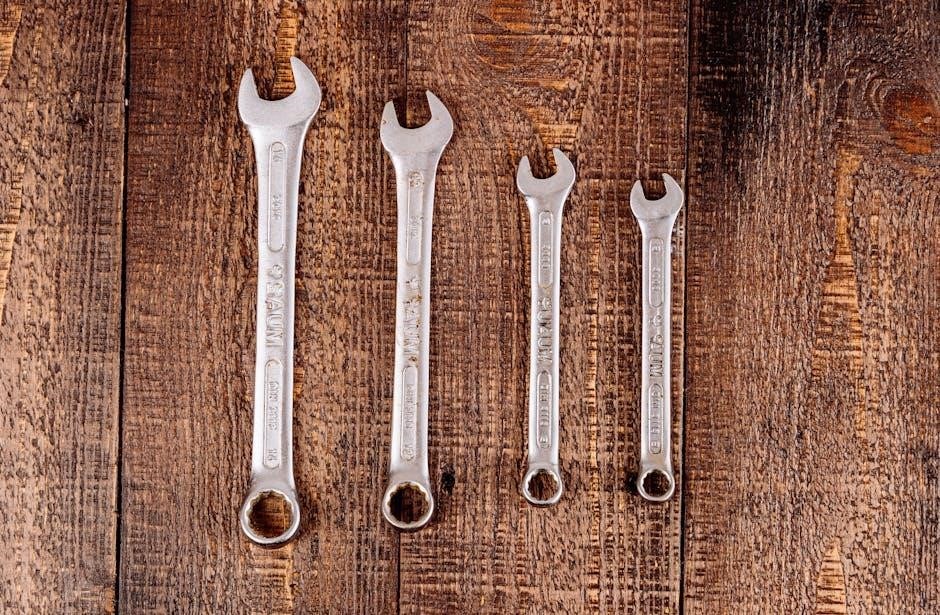
Crucially, connect the hot water line to the dishwasher’s elbow fitting, utilizing two wrenches for a secure, leak-proof connection – one to stabilize and the other to tighten. Verify the water supply is compatible and meets the dishwasher’s requirements. Electrical connection should be performed by a qualified technician, adhering to local regulations.
After connections, run an initial test cycle without detergent to flush the system. Confirm proper drainage and check for any leaks. Refer to the detailed installation procedure outlined in the manual (page 8), paying close attention to safety precautions. Ensure the dishwasher isn’t connected to drinking water lines, as residue may remain.
Loading the Dishwasher Correctly
Efficient loading maximizes cleaning performance and space within your Bosch Serie 8 dishwasher. Begin by removing large food particles from dishes before loading. Position items so water reaches all surfaces; avoid overcrowding, which hinders water circulation.
Place pots, pans, and heavily soiled dishes on the bottom rack, facing the spray arm. Ensure tall items don’t obstruct the arm’s rotation. The upper rack is ideal for glasses, cups, and smaller items; Adjust the rack height if necessary to accommodate larger dishes.
Silverware should be loaded in the cutlery basket with handles down, alternating between forks, knives, and spoons to prevent nesting. Avoid placing long utensils protruding from the basket, as this could cause damage. Proper loading prevents re-soiling and ensures sparkling clean results with every wash cycle.
Detergent Compartment and Usage
The detergent compartment on your Bosch Serie 8 dishwasher is designed for optimal detergent dispensing. Typically, it features a main wash chamber and a pre-wash chamber. Always use dishwasher detergent specifically formulated for automatic dishwashers; hand dish soap will create excessive suds.
For standard washes, fill the main wash chamber according to the detergent manufacturer’s instructions and the level of soiling. If using a pre-wash program, add detergent to the smaller pre-wash chamber. Ensure the compartment lid closes securely to release the detergent at the correct time during the cycle.
Powder, gel, or tablet detergents are all suitable, but tablets often offer pre-measured convenience. Avoid overfilling, as this can leave residue on dishes. Regularly check the compartment for any blockages or leftover detergent to maintain efficient operation and sparkling clean results.
Wash Programs Overview

Your Bosch Serie 8 dishwasher offers a variety of wash programs to cater to different cleaning needs. These programs are designed for varying levels of soiling, dish types, and desired cycle durations. Common programs include Intensive, Eco, Normal, and Quick Wash, alongside specialized options like GlassCare and SilencePlus.
The Intensive program tackles heavily soiled pots and pans, utilizing higher temperatures and extended wash times. The Eco program prioritizes energy and water efficiency, ideal for lightly soiled dishes. Normal provides a balanced clean for everyday use, while Quick Wash delivers a fast clean for lightly soiled items.
GlassCare gently cleans delicate glassware, minimizing the risk of damage. SilencePlus operates at a reduced noise level, perfect for nighttime use. Understanding each program’s characteristics allows you to select the most appropriate setting for optimal cleaning performance and resource conservation.
Intensive Wash Program – Details
The Intensive Wash Program on your Bosch Serie 8 dishwasher is specifically engineered for tackling heavily soiled dishes, cookware, and utensils. This program utilizes higher water temperatures, typically reaching 70°C (158°F), and increased water pressure to effectively remove stubborn food residues like baked-on grease and dried-on food particles.
Cycle duration for the Intensive program is extended, often ranging from 120 to 180 minutes, ensuring thorough cleaning. It’s recommended for items such as casserole dishes, baking trays, and heavily soiled pots and pans. Pre-rinsing is generally not required, as the program is designed to handle significant soiling.
However, due to its intensity, avoid using delicate glassware or easily damaged items in this program. Ensure the spray arms can rotate freely and are not obstructed by oversized items. This program consumes more energy and water compared to other cycles, so use it only when necessary for optimal resource management.
Eco Wash Program – Details
The Eco Wash Program on your Bosch Serie 8 dishwasher is designed to minimize water and energy consumption while still delivering excellent cleaning results. This program operates at a lower temperature, typically around 50°C (122°F), and utilizes optimized water usage throughout the wash cycle. It’s ideal for lightly to moderately soiled dishes.
Cycle duration for the Eco program is generally longer than other cycles, often exceeding 200 minutes, as it relies on extended soaking and efficient water circulation. This extended cycle time contributes to its superior energy efficiency. It’s recommended for everyday dishwashing loads where heavy soiling isn’t present.
To maximize the effectiveness of the Eco Wash, avoid overloading the dishwasher and ensure proper loading techniques are followed. While effective, heavily soiled items may require pre-rinsing or a more intensive wash program. This program is a key feature for environmentally conscious users seeking to reduce their carbon footprint.
Normal Wash Program – Details
The Normal Wash Program on your Bosch Serie 8 dishwasher is a versatile option suitable for a wide range of everyday dishwashing needs. It strikes a balance between cleaning performance, water usage, and cycle duration, making it a practical choice for regularly soiled dishes. Typically, this program operates at a temperature between 55°C and 65°C (131°F ⏤ 149°F).
Cycle duration for the Normal Wash generally falls between 150 and 180 minutes, providing sufficient time for effective cleaning without being excessively long. It’s designed to handle moderately soiled pots, pans, plates, and glassware. This program is a reliable all-rounder for daily use.
For optimal results with the Normal Wash, ensure dishes are loaded correctly, avoiding overcrowding. Using the appropriate amount of detergent is also crucial. While effective on most loads, heavily soiled items might benefit from a pre-rinse or selection of a more intensive program. It’s a dependable choice for consistent cleaning performance.
Quick Wash Program – Details
The Quick Wash Program on your Bosch Serie 8 dishwasher is designed for lightly soiled dishes that require a fast cleaning cycle. This program prioritizes speed, making it ideal when you need dishes cleaned quickly without compromising hygiene. Typically, the water temperature reaches around 45°C to 50°C (113°F ⏤ 122°F).
Cycle duration for the Quick Wash is significantly shorter, usually ranging between 30 to 60 minutes, depending on the specific model and selected options. It’s best suited for items like glasses, cups, and lightly soiled plates that haven’t been sitting with dried-on food residue.
To achieve the best results with the Quick Wash, avoid overloading the dishwasher and use a high-quality detergent. Heavily soiled dishes won’t be thoroughly cleaned with this program. It’s a convenient option for smaller loads or when time is of the essence, offering a quick and efficient cleaning solution for everyday use.
Special Programs: GlassCare, SilencePlus
Your Bosch Serie 8 dishwasher features specialized programs designed for specific needs. The GlassCare program is meticulously crafted to gently clean delicate glassware, ensuring a sparkling finish without damage. It utilizes lower temperatures and a modified wash cycle to protect fragile items from etching or breakage. This program is ideal for crystal and fine glasses.
The SilencePlus program is a standout feature, prioritizing exceptionally quiet operation. This program reduces noise levels significantly, making it perfect for open-plan living spaces or nighttime use. While maintaining effective cleaning performance, it operates at a remarkably low decibel level, often below 44 dB(A).
Both programs offer optimized water usage and energy efficiency. Selecting GlassCare or SilencePlus allows you to tailor the wash cycle to your specific requirements, providing both convenience and superior results. Refer to your model’s specific manual for detailed settings and optimal loading recommendations for each program.
Rinse Options: Extra Rinse, Pre-Rinse

The Bosch Serie 8 dishwasher provides versatile rinse options to handle varying levels of food residue. The Pre-Rinse function is designed for items heavily soiled with food. It utilizes a short, cold-water cycle to remove large particles, preventing them from redepositing during the main wash cycle. This is particularly useful if dishes are left unsoaked for an extended period.
For exceptionally clean results, the Extra Rinse option adds an additional rinse cycle at the end of the selected wash program. This ensures all traces of detergent and loosened food particles are thoroughly removed, leaving dishes spotless and streak-free. It’s ideal for sensitive items or when dealing with heavily soiled loads.
Utilizing these rinse options effectively contributes to optimal cleaning performance and prevents residue buildup. Remember to consider the level of soiling when selecting a rinse option to maximize efficiency and achieve sparkling clean dishes every time. Consult your dishwasher’s manual for specific program compatibility.
Drying Options: SensorDry, Extra Drying
The Bosch Serie 8 dishwasher offers advanced drying technologies for consistently sparkling results. SensorDry utilizes intelligent sensors to detect the moisture level inside the dishwasher, automatically adjusting the drying cycle for optimal efficiency. This prevents over-drying, saving energy and protecting delicate items from heat damage. It adapts to each load, ensuring thorough drying without unnecessary power consumption.
For items that require a more intensive drying process, such as plastics or heavily soiled dishes, the Extra Drying option provides a significant boost. This extends the drying cycle and increases the temperature, guaranteeing complete dryness even for challenging loads. It’s particularly useful in humid environments or when dishes won’t be unloaded immediately.
Combining these drying options with proper loading techniques ensures consistently dry and spotless dishes. Refer to the user manual for specific program compatibility and to understand how to best utilize these features for your needs.
Water Softening System and Settings
The Bosch Serie 8 dishwasher incorporates a sophisticated water softening system to combat limescale buildup, ensuring optimal cleaning performance and extending the appliance’s lifespan. Hard water can leave spots and residue on dishes, and damage internal components over time. This system automatically adjusts to your water hardness level, utilizing a regeneration cycle with special dishwasher salt.

To configure the system, you must first determine your water hardness using a test strip or contacting your local water authority. Then, access the dishwasher’s settings menu and input the corresponding hardness level (typically ranging from 0-8). The dishwasher will then automatically manage the salt consumption and regeneration process.
Regularly check the salt reservoir and replenish as needed, using only dedicated dishwasher salt. Ignoring this maintenance can lead to reduced cleaning effectiveness and potential damage. The display will indicate when salt needs to be added. Proper water softening is crucial for maintaining the dishwasher’s efficiency and protecting your dishes.
Display Codes and Troubleshooting (0-8)
The Bosch Serie 8 dishwasher utilizes a display code system to communicate potential issues. Understanding these codes is vital for efficient troubleshooting. Codes ranging from 0 to 8 indicate various malfunctions requiring attention. For instance, a display showing ‘0’ often relates to a general system error, while ‘8’ typically signals a water supply issue.
Code ‘5’ frequently indicates a problem with the water intake or drainage, potentially caused by a blocked filter or kinked hose. Other codes may relate to heating element failures, sensor malfunctions, or detergent dispensing problems. Before contacting support, consult the manual for specific code definitions and suggested remedies.
Simple solutions like resetting the dishwasher or checking the water supply can often resolve minor issues. However, more complex problems may require professional assistance. Always disconnect the power before attempting any internal repairs. Referencing the complete error code list in the manual will expedite the troubleshooting process and minimize downtime.
Cleaning and Maintenance
Regular cleaning and maintenance are crucial for preserving the performance and longevity of your Bosch Serie 8 dishwasher. Residues from detergents and food particles can accumulate, impacting cleaning efficiency and potentially causing odors. The dishwasher isn’t designed to handle drinking water due to these potential remnants.

Prioritize cleaning the filter regularly – a clogged filter significantly reduces cleaning power. Additionally, inspect and clean the spray arms to ensure unrestricted water flow. Wipe down the door seals and interior surfaces with a damp cloth to prevent mildew and buildup.
Periodically run an empty dishwasher cycle with a dishwasher cleaner to remove stubborn grime and sanitize the interior. Avoid abrasive cleaners, as they can damage the stainless steel surfaces. Proper maintenance not only ensures optimal cleaning results but also prevents costly repairs down the line, keeping your appliance running smoothly for years.
Filter Cleaning Procedure
Maintaining a clean filter is paramount for optimal Bosch Serie 8 dishwasher performance. Locate the filter assembly, typically at the bottom of the dishwasher’s interior. Unlock and remove the filter system – it usually consists of a cylindrical coarse filter and a flat fine mesh filter.
Rinse both filter components thoroughly under running water, using a soft brush to remove any trapped food particles or debris. Pay close attention to the fine mesh filter, as it captures smaller particles. Inspect for any damage and replace if necessary.
Once cleaned, reassemble the filter system correctly, ensuring it’s securely locked into place. A properly installed filter prevents food particles from recirculating during the wash cycle, maintaining cleanliness and preventing clogs. Regular filter cleaning, ideally weekly or bi-weekly depending on usage, ensures consistently sparkling dishes and extends the dishwasher’s lifespan.
Spray Arm Cleaning Instructions
To ensure optimal cleaning performance of your Bosch Serie 8 dishwasher, regularly inspect and clean the spray arms. Locate the upper and lower spray arms inside the dishwasher. They can typically be removed by unscrewing or unclipping them – consult your specific model’s manual for details.
Once removed, examine the spray arm nozzles for any blockages caused by food particles or limescale. Use a fine wire or toothpick to carefully clear each nozzle. Rinse the spray arms thoroughly under running water to remove any dislodged debris.
Inspect the spray arms for cracks or damage; replace them if necessary. Reattach the spray arms securely, ensuring they rotate freely. Clean spray arms guarantee water is distributed evenly, effectively cleaning dishes. Regular cleaning, ideally monthly, prevents reduced cleaning performance and potential damage to the dishwasher.
Preventing Material Damage
Protect your Bosch Serie 8 dishwasher and your valuable items by following these guidelines. Avoid using abrasive cleaners, steel wool, or scouring pads, as they can scratch the stainless steel interior and damage delicate glassware. Only use dishwasher detergents specifically designed for automatic dishwashers.
Do not wash items made of wood, aluminum, copper, pewter, or plastics not labeled “dishwasher-safe,” as they may become discolored or warped. Ensure items are free of food residue before loading; pre-rinsing isn’t usually necessary with modern detergents, but large particles should be removed.
Be cautious with glassware and crystal; secure them properly to prevent breakage. Avoid overloading the dishwasher, as this can hinder proper cleaning and potentially damage items. Remember the dishwasher isn’t designed for drinking water; residue from detergents may remain.
Energy Consumption and Efficiency
The Bosch Serie 8 dishwasher is engineered for optimal energy efficiency, minimizing environmental impact and reducing utility bills. A typical cycle consumes approximately 0.73 kWh of energy, demonstrating its commitment to responsible resource usage. Annual water consumption is around 2100 liters, further highlighting its efficiency.
Utilizing features like Eco Wash and SensorDry technology contributes significantly to lower energy and water usage. SensorDry adjusts drying performance based on load type and humidity, preventing unnecessary energy expenditure. Selecting appropriate wash programs based on soil level is crucial for maximizing efficiency.
Regular maintenance, such as cleaning the filters and spray arms, ensures the dishwasher operates at peak performance, maintaining its energy-saving capabilities. Consider utilizing off-peak electricity hours to further reduce energy costs and contribute to a more sustainable lifestyle.
Water Consumption Details
The Bosch Serie 8 dishwasher is designed to optimize water usage without compromising cleaning performance. The annual water consumption averages approximately 2100 liters, a testament to its efficient design. However, actual water usage varies depending on the selected wash program and rinse options.

The Eco Wash program utilizes significantly less water compared to intensive cycles, making it ideal for lightly soiled dishes. Utilizing rinse options like Extra Rinse will naturally increase water consumption, so consider their necessity based on the load. The dishwasher isn’t designed to use drinking water; residue from detergents may remain.
Ensuring proper loading and avoiding pre-rinsing dishes can also contribute to water savings. Regularly checking and maintaining the water softening system is crucial for preventing scale buildup, which can affect water flow and efficiency. Proper filter cleaning also ensures optimal water circulation.
Safety Precautions
Important safety guidelines must be followed when installing and operating your Bosch Serie 8 dishwasher. Always disconnect the power supply before performing any maintenance or cleaning procedures. Do not allow children to operate or play near the dishwasher, and supervise their use of cleaning products.
Ensure the dishwasher is correctly grounded to prevent electrical shock. Never open the door during a wash cycle, as hot steam may escape, causing burns. Avoid placing heavy objects on the open door, as this could damage the hinges or cause the dishwasher to tip.
The dishwasher is not intended for use by persons with reduced physical, sensory, or mental capabilities without supervision. Only use detergents specifically designed for dishwashers, and store them securely out of reach of children. Do not ingest dishwasher detergent; it is harmful if swallowed. Always follow the manufacturer’s instructions for detergent usage.
Technical Specifications (SMS88UW06G Example)
The Bosch Serie 8 SMS88UW06G dishwasher boasts impressive technical features. Its energy consumption per cycle is 0.73 kWh, demonstrating high efficiency. Annual water consumption is approximately 2100 liters, minimizing resource usage. The appliance operates at a standard voltage of 220-240V and a frequency of 50/60Hz.
Dimensions vary, but typically include a width of 60cm, a depth of 60cm, and a height of 84.5cm – ensure adequate space for installation. The dishwasher features a stainless steel interior for durability and hygiene. Noise levels are exceptionally low, often around 44dB(A), thanks to SilencePlus technology.
It includes multiple spray arms and a powerful circulation pump. The SMS88UW06G offers various wash programs and features a water softening system. Maximum plate size accommodated is 31cm. The appliance’s construction prioritizes energy efficiency and quiet operation, making it a premium choice.
Installation Procedure – Hot Water Line Connection
Connecting the hot water line to your Bosch Serie 8 dishwasher (SMS88UW06G) requires careful attention. Begin by ensuring the water supply is turned off. Locate the elbow on the dishwasher’s water inlet valve. Attach the hot water line to this elbow, utilizing two wrenches for a secure connection.
One wrench stabilizes the elbow while the other tightens the connection. Avoid over-tightening, as this could damage the valve or the water line. Use appropriate sealing tape or a sealing washer to prevent leaks. Double-check the connection for any signs of water seepage after turning the water supply back on.
Ensure the hot water temperature doesn’t exceed 60°C (140°F) to prevent damage to the dishwasher. Proper connection is crucial for optimal performance and to avoid potential water damage. Refer to the full installation manual for detailed diagrams and safety precautions.
Frequently Asked Questions (FAQ)
Q: What do the display codes 0-8 mean? A: These codes indicate various error states. Refer to the “Display Codes and Troubleshooting” section for specific explanations and recommended actions. Q: How often should I clean the filter? A: Regular filter cleaning is vital. Check it monthly, and clean it thoroughly when visibly soiled to maintain optimal performance.
Q: What type of detergent should I use? A: Use only dishwasher detergents specifically designed for automatic dishwashers. Avoid hand dish soap, as it creates excessive suds. Q: How do I adjust the water softening settings? A: The settings depend on your water hardness. Consult your local water authority or use a water hardness test kit to determine the correct setting.
Q: Where can I find more detailed information? A: The complete Bosch Serie 8 (SMS88UW06G) manual provides comprehensive details. Contact Bosch support for further assistance if needed.
Contacting Bosch Support
For immediate assistance with your Bosch Serie 8 dishwasher (SMS88UW06G), Bosch offers multiple support channels. Visit the official Bosch website to access a comprehensive online help center, featuring FAQs, troubleshooting guides, and downloadable manuals. You can often resolve common issues independently through these resources.
To speak directly with a Bosch representative, locate the customer service phone number on the Bosch website, specific to your region. Be prepared to provide your dishwasher’s model number (SMS88UW06G) and a detailed description of the problem you are experiencing. Online chat support is also frequently available for quick assistance.
For complex issues or warranty claims, you may need to schedule a service appointment with an authorized Bosch technician. The website provides a tool to locate qualified service providers in your area. Ensure you have proof of purchase readily available.